
TL;DR – What Is Zenler And Is It As Good As It Claims?
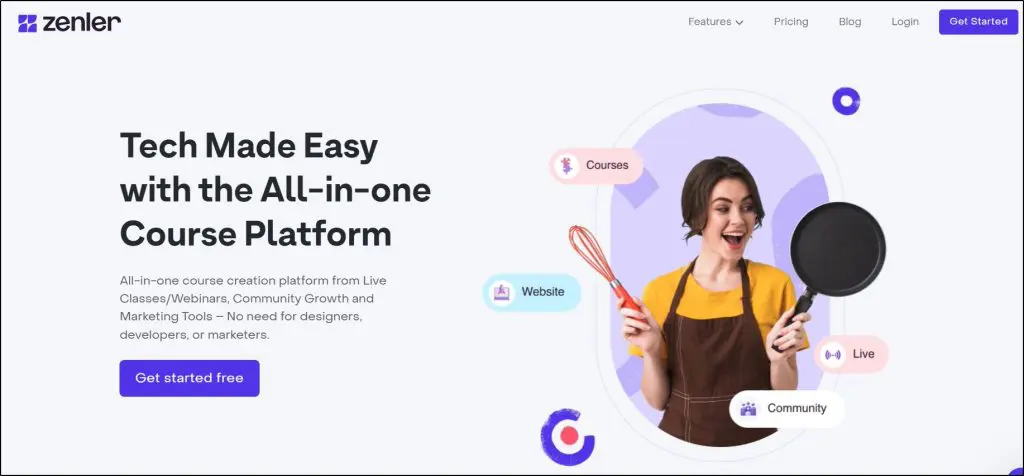
Zenler is an all-in-one online course and coaching platform that combines course hosting, memberships, communities, live teaching, email marketing, funnels, and a website builder under one login. Zenler packs a similar all-in-one toolkit at a lower price, making it a budget-friendly option for creators who want both course delivery and marketing tools without multiple subscriptions.
However, while most of its features are just good enough, Zenler is not as robust and versatile as Kajabi or Thinkific. So, it only make sense to choose it if you want an all-in-one platform in a limited budget.
Zenler Pricing & Free Trial:
– No free plan
– Free trial: Yes, 14 days
– Pro Plan: $647/year (~$54/month)
– Premium Plan: $1447/year (~$120/month)
Zenler Is Best For:
– Creators who want one platform for courses, coaching, and marketing
– Solo educators or small teams on a budget
Zenler Is Not for:
– Those who want the most polished, bug-free experience
– Creators who need advanced customization or top-tier marketing tools
– Kajabi and Thinkific are better alternatives
Main Features:
– Course creation with drip scheduling and learning paths
– Membership sites & community spaces for students
– Live classes and coaching support
– Email marketing and funnels
– Website builder and landing pages
– Quizzes and certificates
– Mobile app for students
– Basic AI tools for course and marketing content
Try Zenler For Free
Zenler has quietlly evolved into an impressive all-in-one platform for course creators, coaches, and membership site owners who want to run their entire business from one dashboard.
You don’t hear about it as much as Kajabi or Teachable, but it’s worth checking out if you’re looking for a platform that handles everything from product creation and community building to sales and marketing.
In this review, I’ll cover everything I’ve learned about Zenler from hands-on testing and client feedback. I’ll also highlight where Zenler shines, where it still needs work, and whether it’s the right platform for your online business.
Let’s dive in.
Zenler Product Snapshot
Before we discuss the details, here’s a bird’s-eye view of Zenler to help you understand what it offers.
| What Is Zenler? | Zenler is an all-in-one platform for creating and selling online courses, memberships, and coaching programs — complete with built-in community, live teaching, and marketing tools. |
| What Makes It Different? | Combines courses, memberships, community, live teaching, and marketing tools in one platform at a lower price than Kajabi. Includes Zenler AI to speed up content creation and marketing. |
| Course Features | Unlimited courses & students, drip content, quizzes, assignments, bulk lesson upload, certificates, course bundles, prerequisites. |
| Memberships | Create tiered membership plans with exclusive course bundles, community access, and member-only content. |
| Community | Built-in groups, discussion boards, live chat, student progress tracking, and engagement analytics. |
| Website Builder | Drag-and-drop builder with one customizable template, blogs, SEO settings, and integrated payment pages. |
| Live Teaching | Run live classes and webinars with polls, chat, screen sharing, and replays. Works for coaching, training, and Q&A sessions. |
| Sales & Marketing | Funnels, email automation, upsells, coupon codes, affiliate program, lead capture pages, and webinar registration funnels. |
| Mobile App | Student app for course access on iOS & Android (creator app still in development). |
| Starting Price | $67/month (billed annually) for Pro Plan. |
| Free Plan or Trial | 14-day free trial on all paid plans. |
| What’s Missing | No built-in phone support, limited advanced design customization, and no fully featured creator mobile app yet. |

If you have the budget, I recommend using Kajabi, the best all-in-one platform
What Is Zenler?
Zenler is an all-in-one online course and membership platform that lets you create, market, and sell courses, memberships, communities, and live sessions from a single dashboard.
It’s been around for several years but has gained more attention recently as an affordable alternative to higher-priced all-in-one platforms.
While it’s still less well-known than some big names in the market, it has built a loyal base of creators who value its breadth of features for the price.
From my experience, Zenler works best for course sellers, coaches, and consultants who want to combine self-paced training with live teaching or group programs.
It’s equally suited for a pure course business or a hybrid coaching model, thanks to built-in tools for webinars, workshops, and private communities.
The real advantage is how quickly you can go from idea to launch. You can:
- Build your course site with a drag-and-drop builder
- Upload videos, PDFs, audio, and quizzes in minutes
- Create private or paid communities for students or coaching clients
- Set up sales funnels and email sequences without leaving the dashboard

Here are some of the main features you get with Zenler.
- Course Creation – Upload videos, audio, PDFs, and quizzes to build structured learning paths.
- Memberships – Create tiered membership plans with gated content and exclusive perks.
- Community Spaces – Host private, branded communities where members can post, comment, and interact.
- Website Builder – Design your course or membership site using a drag-and-drop page editor.
- Live Classes & Webinars – Schedule and run live sessions, workshops, and Q&A calls directly in Zenler.
- Email Marketing – Send automated sequences, broadcast emails, and targeted campaigns without extra tools.
- Sales Funnels – Build landing pages, opt-ins, and upsell/downsell flows to convert visitors into buyers.
- AI Tools – Use built-in AI to help write course descriptions, emails, and marketing copy faster.
- Quizzes & Assignments – Add interactive learning checks and collect student submissions.
- Payment Integrations – Accept global payments via Stripe, PayPal, and other gateways.
- Mobile App – Give students on-the-go access to your content with Zenler’s branded app option.
- Analytics & Reporting – Track sales, student engagement, and course completion rates in one place.
- Affiliate Program Management – Set up and manage affiliates to help promote your courses.
Zenler removes the tech headaches and is quite easy to use. If you want an all-in-one setup and you’re tired of stitching together multiple tools, Zenler offers a refreshingly streamlined way to run your business, at a competitive price.
Zenler Strengths & Weaknesses
Zenler is an all-in-one home for your courses, community, memberships, live classes, and marketing. That makes it a direct alternative to platforms like Kajabi and Kartra that typically cost much more.
Here’s how it stacks up in real-world use.
| Strengths | Weaknesses |
| True all-in-one setup — Courses, memberships, community, live teaching, funnels, and email marketing are all under one roof, so you can run your whole teaching business without piecing together multiple tools. | Design flexibility is limited — The website builder works well for most creators, but offers only one template design isn’t as customizable as dedicated site builders or open platforms. |
| Unlimited courses & students — You can grow your library and audience without hitting plan caps or paying extra for expansion. | Occasional clunky UI & glitches — The page builder can feel sluggish, with some minor bugs in drag-and-drop editing and new features that need a few updates before running smoothly. |
| Built-in live classes & webinars — You can host, interact, and sell without paying for separate webinar software. | Smaller integration ecosystem — You’ll find core integrations, but fewer niche or advanced connections compared to more open systems. |
| Zenler AI — Speeds up course content creation, email campaigns, and marketing copy so you can launch faster. | Basic email marketing — Good for simple campaigns, but lacks the advanced automation and deep analytics of dedicated email tools. |
| Strong value for money — Offers the same “all-in-one” setup found in pricier tools at nearly half the cost, especially for growing businesses. | Limited webinar analytics — Engagement and performance tracking isn’t as deep as in specialized webinar platforms. |
| Flexible memberships — Create tiered plans, bundles, and gated community areas from inside Zenler. | No free forever plan — Only a 14-day trial, so you need to commit quickly if you want to continue. |
Zenler offers most of the capabilities found in premium platforms from course hosting to live events at a much lower monthly cost.
The trade-off is polish and depth.
It doesn’t have the design freedom of standalone site builders or the marketing firepower of advanced CRM tools.
Zenler Pricing & Free Trial | How Much Does It Cost
Zenler does not have a free plan, but it does offer a 14-day free trial so you can test all features before committing.
There are two premium plans (billed annually) to choose from, both offering the full all-in-one toolset with different limits on leads, sites, and advanced features.
- Pro Plan – $54/month
- Premium Plan – $121/month
The Pro Plan is ideal for new and growing course creators who want all core Zenler features but don’t need unlimited leads or large team capacity yet. The Premium Plan suits established businesses running multiple sites, high-volume marketing campaigns, and larger live events.
Zenler Pricing Comparison
| Feature | Pro Plan | Premium Plan |
| Monthly Price (Annual Billing) | $54 | $121 |
| Courses & Students | Unlimited | Unlimited |
| Leads | 25,000 | Unlimited |
| Emails/month | 100,000 | 500,000 |
| Marketing Funnels | 100 | Unlimited |
| Sites | 3 | 10 |
| Custom Domains | 3 | 10 |
| Site Admins | 10 | 20 |
| Instructors | 20 | 100 |
| Assistants | 10 | 50 |
| Support Staff | 10 | 50 |
| Live Sessions | Included | Up to 300 sessions (500 attendees each) |
| Zenler AI | ✅ | ✅ |
| Advanced Analytics | ❌ | ✅ |
| Concierge Migration | ❌ | ✅ |
| SSO/API Access | ❌ | ✅ |
Looking for a membership platform? Here are my top picks
Zenler Website Examples | Live Courses & Memberships On The Platform
Before we jump into Zenler’s features, let’s quickly view some live examples of online courses, memberships, communities, and digital product offers that creators have built on this platform.
Visit these sites, explore their courses, and see their checkout process to know the kind of experience you can offer using Zenler.
Zenler Example #1: Intentionally Eat

Intentionally Eat is a program for plant-based weight loss and healthy living, built using Zenler. It offers on-demand online courses, downloadable resources like PDFs and meal plans, coaching videos, and a supportive online community. The entire program is hosted on Zenler, showing how creators can deliver content and coaching in one place.
Zenler Example #2: Gardening With Soule

Jacqueline Soule runs Gardening With Soule on Zenler, where she offers on-demand gardening classes, workshops, and guides based on her decades of expertise as an award-winning garden writer. Alongside digital courses, she also sells books and resources directly through her Zenler-powered site, creating a hub for gardeners to learn and connect.
Zenler Example #3: My Connected Motherhood

My Connected Motherhood is a popular membership program built on Zenler, offering online courses and resources that help parents improve their child’s sleep and embrace gentle parenting practices. For a monthly subscription, members get access to guidance grounded in attachment science, neurodevelopment, and emotional understanding, all hosted within a Zenler-powered learning space.
Zenler Features For Creating & Selling Courses & E-Learning Products
Let’s now explore Zenler’s core features in more detail.
Feature #1: Online Courses
In Zenler, your courses aren’t just standalone lessons. You can connect them into a learning path so students move through topics in the right order.
For example, you could have a beginner course feed directly into an intermediate one, helping learners progress without getting lost.
Creating a course follows a clear, step-by-step process. You upload your content, organize it into sections, and decide how and when students get access. Everything happens inside the same drag & drop builder, so you’re not juggling multiple tools.

You can create anything from a short workshop to a full multi-level program. Courses can be entirely self-paced or paired with live teaching.
Zenler lets you mix videos, audio, PDFs, and text in one place, so you can adapt to different learning styles.
Here’s how it works.
- Start a new course – Add your title, description, and price (or make it free).
- Add modules and lessons – Upload your materials and group them logically.
- Arrange the learning path – Drag and drop lessons or link courses together for a smoother flow.
- Set access rules – Decide if lessons unlock all at once or follow a schedule.
- Publish – Go live and start enrolling students.
You can also control how students access your courses.
- Drip scheduling lets you control the pace by releasing lessons on set dates. This is great for keeping a group of learners on the same timeline.
- Lesson previews allow potential students to sample your content before buying.
- Course bundling helps you package related courses together for more value.
- Multi-format support means you can have a video lesson with a downloadable PDF and an audio file all in one place.
From my experience, Zenler’s course tools give you the structure you need to guide learners while still keeping setup quick and manageable.
Feature #2: Memberships
Zenler lets you create membership programs where students pay regularly for access to your content. This works well if you want an ongoing learning experience rather than a one-off course.
Memberships can include multiple courses, exclusive videos, live sessions, and downloadable resources.
You can control who sees what based on their membership level, so beginner members can get starter material while advanced members see more in-depth training.
Here’s how it works
- Create a membership product – Name it, set the price (monthly, yearly, or custom), and add your content.
- Organize your content – Add courses, videos, files, or community spaces to the membership area.
- Set member access levels – Decide if all members get the same content or if different tiers get different materials.
- Launch – Share your signup page and start enrolling members.
While Zenler’s membership feature is solid for basic setups, it’s not as advanced as dedicated membership plugins or platforms.
You don’t get in-depth analytics on member engagement, which makes it harder to spot when someone is losing interest.
And while you can set up multiple tiers, there’s no native built-in rewards or loyalty system, so keeping long-term members engaged requires extra manual effort.
From my experience, this is fine for most course creators starting out with memberships, but high-volume membership businesses may eventually want more control and deeper reporting.
Feature #3: Online Community
Zenler includes built-in community spaces so you don’t have to rely on Facebook Groups or external forums. You can create either a single site-wide community or separate communities for individual courses or memberships — useful if you want focused discussions for each group.
Communities are organized like simple discussion boards where members can post updates, ask questions, and comment. You can share text, images, or videos, and even pin important announcements at the top.
Here’s what you get with Zenler’s communities.
- Separate or shared communities – Choose between one central community or multiple course-specific groups.
- Discussion threads – Organize conversations by topic for easier navigation.
- Post types – Share text, images, videos, or links.
- Announcements – Pin important posts at the top for all members to see.
- Basic moderation tools – Control member access and manage posts.
For course creators, this means you can keep all learning and networking in one place. The limitation is that these communities are fairly basic. There’s no advanced gamification or complex moderation tools.
But they do a good job of encouraging interaction and keeping learners engaged without leaving your platform.
Feature #4: Coaching & Live Teaching
Zenler goes beyond static course delivery by giving you tools for live, interactive sessions, whether it’s one-on-one coaching, group programs, or classroom-style teaching.
For coaching, you can:
- Create separate coaching products.
- Offer single-session or multi-session packages.
- Integrate with Zoom for direct scheduling and hosting.
- Set up payments and send automated reminders.
It’s ideal for creators who want to bundle coaching + courses into a single package. However, Zenler’s coaching setup is more basic compared to dedicated coaching CRMs. You won’t get detailed client progress tracking or multi-coach management. Many coaches still pair it with tools like Calendly for more advanced scheduling.
For live teaching, Zenler supports:
- Hosting webinars or workshops inside the platform.
- Running recurring live classes for your courses.
- Using live chat and Q&A during sessions.
- Recording sessions for on-demand access later.
You can run both public events to attract leads and private sessions for enrolled students. Since it’s all integrated, you can move seamlessly from a live masterclass to enrolling attendees in a course or coaching package.
The trade-off is that it doesn’t match the advanced event management of standalone webinar platforms, but for most course creators, it’s enough to deliver a polished, interactive experience without juggling extra tools.
Feature #5: Quizzes & Certificates
Zenler gives you enough assessment tools to keep learners engaged and measure their progress. You can place quizzes anywhere inside your course (within a lesson, at the end of a section, or as a final checkpoint before issuing a certificate.)
Here are the quiz types you can use.
- Multiple choice (single or multiple correct answers)
- Fill in the blank
- True/False
- Survey mode (no right/wrong scoring)
Quizzes can be used for quick knowledge checks or as mandatory pass requirements before a student can move forward. They work well with drip content, so you can unlock new lessons only after a quiz is completed.
Certificates are straightforward to set up. You can design them with your own branding and let Zenler automatically award them when a learner finishes all lessons or passes a quiz with the required score.

That said, both quizzes and certificates are more functional than flashy. There’s no question bank or advanced randomization for quizzes, and certificate templates are limited. But for most course creators, they’re perfectly adequate for delivering structured learning and recognizing achievements.
Feature #6: AI Capabilities
Zenler has started adding AI capabilities directly into its platform, but instead of offering them as standalone tools, they’re embedded within existing features you already use.
For example, when creating courses or lessons, you’ll find AI text generation options that help you draft lesson outlines, learning objectives, or even quiz questions.
In email marketing, AI can suggest subject lines and body copy based on your campaign goal. These integrations save time by keeping you inside the same workflow instead of switching to external AI tools.
Right now, Zenler’s AI is more of an assistant layer than a full creative powerhouse. It’s useful for quick content prompts and structure ideas, but you’ll still want to refine and personalize the output to match your voice.
Feature #7: Email Marketing & Funnels
Zenler comes with built-in email marketing tools so you can communicate with your audience without needing a separate service.
You can send broadcast emails to all your subscribers, set up automated sequences, and trigger emails based on specific actions, like a student enrolling in a course, completing a lesson, or abandoning checkout.

Segmentation is available, but it’s basic. You can group contacts by tags, course enrollments, or actions taken inside your site.
It’s enough for small- to medium-sized audiences, but if you run complex campaigns or need advanced behavioral targeting, a dedicated email platform like ConvertKit or ActiveCampaign will still be more powerful.
On the funnels side, Zenler lets you create simple, guided sales funnels for selling courses, memberships, or live sessions. You can design opt-in pages, sales pages, upsell offers, and thank-you pages without coding.
These pages can be connected to automated email sequences, so you can capture leads and nurture them through your sales process.
Where it falls short is in deep funnel analytics and advanced testing. You won’t get the same level of split-testing or multi-step tracking that high-end funnel builders provide.
Feature #8: Website Builder & Landing Pages
Zenler includes a drag-and-drop website builder so you can run your entire online school without relying on WordPress or external site builders. You can create your main site, course sales pages, and any extra landing pages directly inside Zenler.
The builder comes with one simple template for homepages, course catalogs, lead capture pages, and thank-you pages.
That’s a major limitation because most Zenler sites look the same becuase it offers only one template for the home page.
However, you can customize text, images, videos, and layout blocks, as well as add your own branding, colors, and fonts. It’s straightforward enough for non-designers, but you won’t get the same pixel-perfect design control as a dedicated web design tool.
For landing pages, Zenler makes it easy to connect them with your funnels, forms, and checkout pages. This means you can build lead generation pages and link them to automated email sequences without touching a single line of code.
A few limitations are worth noting:
- It offers only one standard template. The design elements and layouts are quite rigid, so fully custom designs are harder to achieve.
- While it supports SEO basics like titles and descriptions, advanced SEO controls are limited.
- Blog functionality exists but is basic, making it more suitable for announcements than a full-scale content marketing strategy.
Overall, Zenler’s website builder is quite limited in terms of design and customization. But still an acceptable choice for creators who want a functional, branded online school with minimal setup. If you want highly customized layouts or advanced marketing sites, you may need an external builder and then connect it via domain mapping.
So, Is Zenler Worth Using For Your E-Learning Business?
Zenler has one big appeal.
You get almost everything in one place: course hosting, memberships, communities, live sessions, email marketing, funnels, and even a basic website builder.
On paper, it looks like a dream for a creator who wants to avoid juggling multiple tools.
Use Zenler if you want a single platform that covers both course delivery and basic marketing, and you’re comfortable with a tool that gives you breadth over depth. I
t works especially well for solo course creators or small teams who’d rather keep costs predictable than stitch together a stack of separate services.
It’s best for:
- Creators who want to sell courses and coaching from the same dashboard.
- Those who value an integrated marketing stack, even if it’s not best-in-class.
- People who want to get started quickly without investing in multiple tools.
It’s not best for you if your top priority is refined, highly polished feature quality in every area. Zenler’s tools work, but they’re not always as smooth, customizable, or bug-free as dedicated platforms.
Its course builder is capable, but not as flexible as Thinkific; its marketing features are handy, but not as advanced as a full email automation suite; its community features are functional, but basic.
The honest bottom line: Zenler delivers on the promise of “all-in-one” at a competitive price, but it trades off some polish and advanced capabilities in the process. If you want one login, one bill, and a full toolkit that’s good enough for most course and coaching businesses, Zenler is a solid pick. If you have the budget and patience to combine best-in-class tools, you might find better performance elsewhere.
Frequently Asked Questions (FAQs)
1. Does Zenler take a cut from my sales?
No, Zenler does not charge transaction fees on top of your plan cost. However, standard payment processor fees (Stripe/PayPal) still apply.
2. Can I use my own custom domain with Zenler?
Yes, you can connect your own custom domain to your Zenler site so students see your brand instead of a Zenler-branded URL.
3. Does Zenler support multiple instructors on one account?
Yes, you can add team members or instructors, but the number of admin accounts depends on your plan.
4. Can I sell courses in multiple currencies?
Yes, Zenler supports multiple currencies, but each course can only be priced in one currency at a time.
5. Does Zenler have a mobile app for instructors?
Zenler offers a mobile app for students. Instructors can manage some aspects of their school from the web browser on their phone, but there’s no full-featured instructor app.
6. Can I integrate Zenler with third-party tools?
Yes, Zenler supports integrations through Zapier, webhooks, and native connections with select tools like Zoom and Stripe.
7. Does Zenler allow installment payments or subscriptions for courses?
Yes, you can offer payment plans, subscriptions, or one-time payments for your products.
8. Can I import existing courses from another platform into Zenler?
You can upload your course videos, files, and materials into Zenler, but there’s no one-click migration tool for full course structures.
9. Is Zenler SCORM or xAPI compliant?
No, Zenler does not support SCORM or xAPI, so it’s not ideal for formal corporate training requirements.
10. How does Zenler handle video hosting?
Zenler hosts your videos on its own servers with unlimited bandwidth, so you don’t need a separate Vimeo or Wistia account.
Table of Contents


I just signed up for the beta and the prices have increased by $200 and $280, respectively. A bit taken aback and slightly less excited, as it’s getting into the territory of Kajabi and others’ rates.
Thanks for this heads up, Andrew. I hadn’t tuned into the price change yet. I’ll note, though, that even with the higher price, it is still quite a bit less than Kajabi and New Zenler does still offer a free plan, which Kajabi doesn’t.
Yes, Jeff, and so far I like the user experience better than Kajabi. I also wasn’t a fan of the target demographic and Kajabi’s sales tactics. It just felt like a pyramid scheme and a façade. I look forward to success and a good relationship with Zenler. I stayed up until 4am building a course with the software, it was such a great experience. I’ll report back with more as I progress. ????
Thanks, Andrew. Please do report back. I’d love to hear about your progress, and I know it would be very helpful to other readers here.
I am using new zenler for creating courses for my client. But I am not able to find any customer care email id chat or number…. can u pls guide…..
If you look for help in their support site and can’t find an article that helps, you can choose “Didn’t help” icon at the bottom of screen and you’ll get an interface to contact support. Not great, but that seems to be how they handle it right now. https://support.newzenler.com/en/