
TL;DR: What is a virtual presentation and tips to present effectively
Virtual presentations are structured talks delivered online—live (webinars, virtual conferences, workshops) or recorded (on-demand sessions inside courses, coaching programs, or event replays). They usually run 20–45 minutes, and they succeed or fail based on structure, clarity, and how well you keep attention on a screen.
Virtual Presentation Skills You Need
Clarity without feedback (explain simply even when you can’t read the room)
On-camera control (voice, pacing, eye line, energy)
Attention guidance (direct focus when distractions are one click away)
Structured thinking (tight flow, clear objectives, no wandering)
Purposeful pausing (silence for processing, reflection, and retention)
Most Common Virtual Presentation Mistakes
– Treating it like an in-person talk
– Overloading slides with text Starting too slow and losing people early
– Talking nonstop with no pauses
– Trying to cover too much
– Not designing participation
– Reading slides/notes word-for-word
– Assuming silence means failure
– Underestimating audio/lighting/screen-share friction
– Ending without clear next steps
How To Run Effective Virtual Presentations
1. Plan and script so your timing and structure don’t collapse online.
2. Nail the opening and earn attention in the first minute.
3. Cut and chunk around 2–3 clear objectives to reduce overload.
4. Mix media wisely so visuals support learning, not clutter it.
5. Space and repeat key ideas so they actually stick.
6. Build participation with prompts and pauses, even in recordings.
7. Pave the path forward with resources, next steps, and accountability.
Zoom is the most convenient platform for delivering virtual presentations. But if you’re hosting a large event, consider a virtual conference platform.
As organizations have gotten used to hosting virtual events and attendees have gotten used to participating online, expectations have gone up. A lot. The average talking-over-PowerPoint presentation that has been the mainstay of Webinars for years just doesn’t cut it anymore in most cases.
It’s not that these types of presentations can’t be good and useful. It’s just that most of them aren’t, and never have been. And now that attendees are being subjected to an even higher volume of them than usual, patience for them is dropping fast.
In some cases, event planners and attendees are vocal in complaining about them. I see this a fair amount on association discussion boards that I frequent. More commonly, though, attendees simply tune out or (because their expectations have rarely been met in the past) simply don’t show up.
Now, if you are a speaker, regardless of whether you get paid for it, you probably have goals like building a brand for yourself and your business, and actually having a positive impact on the lives of the people you address.
So, a presentation that sucks just isn’t good for anyone.
Virtual Presentations: A High-Level Overview
| Aspect | Virtual Presentations (At a Glance) |
|---|---|
| What they are | Structured talks or learning sessions delivered online to a remote audience |
| How they’re delivered | Live, pre-recorded, or a hybrid of both |
| Live delivery | Real-time sessions with chat, Q&A, polls, and interaction |
| Recorded delivery | On-demand presentations viewed asynchronously, often reused over time |
| Typical presentation elements | On-screen presenter video, presentation slides, screen sharing, audio narration, chat, and simple polls |
| Where they’re hosted | Live platforms like Zoom and Microsoft Teams, or on-demand platforms like Thinkific |
| Common formats that use them | Webinars, masterclasses, virtual workshops, virtual conferences, coaching sessions, and online courses |
| Are they different from these formats? | No. Virtual presentations are the core building block used inside these formats |
| Typical duration | 20–45 minutes for most sessions; longer formats require chunking and breaks |
| Primary goal | Teach, inform, influence, or guide action without being in the same room |
| Core skills required | Clear communication, structured thinking, on-camera presence, attention guidance, and purposeful pausing |
| Biggest challenge | Limited feedback and shared physical energy |
| Most common mistake | Treating virtual presentations like in-person talks |
| Main opportunities | Global reach, easy recording and reuse, scalability, and integration into courses, coaching, and communities |
What Is a Virtual Presentation?
A virtual presentation is a structured talk or learning session delivered online instead of in a physical room. It’s typically presented live or recorded in advance and shared through a webinar platform, video player, online course, or virtual event.
Unlike in-person presentations, virtual presentations rely entirely on screen presence, pacing, structure, and intentional engagement. You don’t have body language in the room, side conversations, or visual cues from the audience to help you adjust on the fly. Attention is easier to lose and harder to regain.
Virtual presentations can take many forms. They may be live webinars with chat and Q&A, on-demand recordings viewed asynchronously, virtual conference sessions, or instructional videos used inside online courses, coaching programs, or professional communities.
What makes a virtual presentation effective is not the technology itself, but how well the presenter designs for the environment. Clear objectives, a strong opening, focused content, deliberate pauses, and opportunities for participation matter far more online than they typically do in face-to-face settings.
Virtual Presentations vs. In-Person Presentations: Key Differences
To help you understand the key differences between virtual and in-person presentations, I’ve put together this quick comparison table.
| Aspect | Virtual Presentations | In-Person Presentations |
|---|---|---|
| Audience attention | Easier to lose; distractions are one click away | Easier to hold with physical presence |
| Feedback cues | Limited (chat, emojis, silence) | Immediate (facial expressions, body language) |
| Pacing flexibility | Must be tightly planned; harder to adjust live | Easier to slow down, speed up, or improvise |
| Opening importance | Critical in the first 30–60 seconds | Important, but audience is already “locked in” |
| Participation | Must be deliberately designed and prompted | Can happen more naturally |
| Content structure | Requires strong scripting and chunking | Can rely more on flow and presence |
| Use of slides | Slides often become the main visual anchor | Slides support the speaker, not replace them |
| Energy delivery | Must be intentional and amplified on camera | Energy transfers more naturally in the room |
| Rewatch value | Often recorded and replayed | Usually a one-time experience |
| Follow-up impact | Needs resources and next steps to prevent drop-off | Informal follow-ups often happen naturally |
The Virtual Presentations Skills You Need to Master
Delivering strong virtual presentations requires skills that help you bridge the gap created by screens, distance, and limited feedback. These five are the most critical and most learnable.
- Skill #1 – Clarity without feedback: The ability to explain ideas simply and completely without relying on facial expressions, nods, or real-time cues from the audience.
- Skill #2 – On-camera communication control: Managing voice, pacing, eye line, and facial expression so your presence feels focused and confident through a screen.
- Skill #3 – Attention guidance: Actively directing where the audience should focus since distractions are constant in virtual settings.
- Skill #4 – Structured thinking under constraint: Organizing content tightly because time, attention, and tolerance for wandering are limited online.
- Skill #5 – Purposeful pausing: Using silence and pauses intentionally to support thinking, reflection, and retention rather than filling every moment with talk.
The Most Common Virtual Presentation Mistakes
Even experienced presenters struggle in virtual settings because the rules are different. These are the mistakes that most often undermine otherwise solid content.
- Mistake #1 – Treating it like an in-person talk: Relying on energy, presence, or improvisation instead of structure and clarity.
- Mistake #2 – Overloading slides with text: Forcing attendees to read and listen at the same time, which increases cognitive load.
- Mistake #3 – Starting too slowly: Opening with introductions instead of a clear reason to pay attention.
- Mistake #4 – Talking without pausing: Leaving no space for reflection, processing, or participation.
- Mistake #5 – Covering too much content: Trying to teach everything instead of focusing on what actually matters.
- Mistake #6 – Ignoring participation: Assuming engagement will happen without prompting or guidance.
- Mistake #7 – Reading slides or notes verbatim: Reducing the presenter to a narrator instead of a guide.
- Mistake #8 – Assuming silence means failure: Interpreting muted microphones or quiet chat as disengagement.
- Mistake #9 – Underestimating technical friction: Letting small audio, lighting, or screen-sharing issues break momentum.
- Mistake #10 – Ending without a clear next step: Failing to guide learners on what to do after the session ends.
How to Deliver Engaging Virtual Presentations: Tips From My Experience
Let me now share how I went from being an unsure presenter to acing virtual presentations and events. these are my top tips I’ve learned over the years as a virtual presenter.
First, let me give you a quick overview before diving deeper.
- Plan and script your presentation: Virtual sessions leave little room for improvisation, so scripting helps you stay clear, focused, and on time.
- Nail the opening: Grab attention immediately by showing relevance and value before viewers mentally check out.
- Cut and chunk your content: Focus on a few clear objectives and break content into short segments to avoid overload.
- Mix media wisely: Use slides, visuals, and narration only when they make ideas easier to understand.
- Space and repeat key ideas: Revisit important concepts at intervals so they move from short-term to long-term memory.
- Design for participation: Build in prompts, pauses, and simple activities to create effort and engagement.
- Pave the path forward: End with clear next steps, resources, and accountability so learning continues after the session.
Now let me explain each of these in more detail.
Read: How to host successful virtual conferences
1. Plan And Script Your Virtual Presentation
When you present in a live face-to-face setting, you have a good bit of wiggle room. It’s pretty easy to speed up, slow down, or even drop entire sections of your content on the fly. With slides as a backdrop (or crutch) and a rough outline or notes, many speakers make it through these types of presentations with relatively little planning or practice.
This is a much harder approach to pull off with a recorded virtual presentation.
In the first place, there is almost always going to be some sort of time constraint for your talk. If the event planner tells you “25 minutes” for example, you may be able to come in a few minutes short or long, but any more than that and you may really screw up the timing for the event.
So, ideally, you need to have a solid idea of how long your content will run before you press record.
Second, because you will not be able to answer questions as you speak or adjust your content on the fly, it pays to really think through the most essential points you want to make and figure out how to make them in the most logical, concise, and compelling way. (Of course, good speakers should also do this with their live presentations, but let’s face, many don’t.)
Fortunately, there is a sure-fire way to address the issues I’ve just raised: write out your entire presentation.
I can feel groans rumbling through my keyboard even as I write this, but really, there is no better way to make sure you have you content structured effectively and that you can deliver it in the time allotted. We know very well, after all, the number of words that correspond to a minute of speech. Using an online calculator like this one, you can easily determine how many words you need to write.
Now, it’s possible that with a general idea of the number of words you are aiming for you can manage to work off of just an outline and notes. Good for you if you can, but I’ve never found that to work well. I strongly prefer to script the whole presentation and either memorize it or read it (with the help of a simple teleprompter like this one). Either way with enough practice runs so that I am able to do it naturally.
As I write, I have four key aims in mind, which leads to my next point …
2. Nail Your Presentation’s Opening
First, I want to make sure the introduction pulls attendees in as much as possible. Again, this is a good practice for any presentation, but I think it is particularly important for recorded virtual presentations. Attendees can check out very quickly – whether figuratively or literally – if you aren’t able to engage them in a meaningful way right at the start.
So, “Hi, I’m Jeff. So nice to be here” isn’t a great start.
My stand-by for introductions is to share a story or anecdote with just me on screen – usually no slides, at least for the first minute or so. I think of this story as a sort of “landing page” or sales page for the entire presentation. Its purpose is to move attendees to “buy in” to watching and participating in the rest of the presentation. With that perspective in mind, it can be useful to borrow the classic AIDA approach used by marketers in deciding on and structuring your story:
A: Attention – Offer content at the very beginning that will grab attention. This may be a provocative statement, question, or quote; it may be an image; it may be the setting you choose to film yourself in or just something about how you present yourself on screen. Really, the possibilities are endless.
I: Interest – Grabbing attention purely for the sake of attention is pointless (and can be annoying). How can you build on the attention you receive to foster deeper interest? Usually, this will mean pivoting quickly to establish the relevance of your opening attention grabber to your audience. It means beginning to establish the “why” of your presentation for the audience you are addressing
D: Desire – Interest is a necessary step beyond attention, but for attendees to really engage with you and your material, they have to see the potential for value and applicability in their own lives. This is the classic “WIIFM,” or “What’s In It For Me” aspect of adult learning. While you don’t have to explicitly address the WIIFM aspect of your presentation in your opening, there should be a strong enough sense of it that attendees want to – better yet, feel compelled to – stick around to realize the value that your presentation promises.
A: Action – A good sales page includes a clear “call to action,” and so should the opening to your presentation. Each of the three steps above lead to the action you want from your attendees: a commitment to watch and participate in the remainder of your presentation. You may ask for this commitment more or less overtly, depending on the nature of your opening, but it should be clear as you transition to the next part of your content that you want and expect your attendees to come along for the ride. This may literally include asking them to acknowledge – to themselves or in the chat area, if there is one – that they are committed to participating.
While addressing each of the components of AIDA may seem challenging, there are few things that make a bigger difference in how a presentation is received than the opening. It sets the tone; it sets expectations; it establishes a sort of agreement with your attendees. A strong opening builds momentum that can carry attendees through even weaker parts (there are always some!) in the remainder of your presentation.
A story, of course, is just one approach. Another one might be to present some sort of challenge or problem that is relevant to the topic and the audience. Present it and then build in some time in which you are silent and allow attendees to work on the problem before you present a solution. Or, present a thought-provoking question, a quote from a well-known thinker or practitioner, or a compelling image. Any of these can be a door into gaining attention, exciting interest, developing desire, and asking for action.
One final point: While I’ve relied on a marketing inspired approach here, I’ll note that all of this jibes with what research in cognitive and behavioral science has taught us. Establishing and sustaining attention is critical to learning as is taking action. Helping these things happen is the essence of good teaching, and that’s exactly what a strong opening step you up for.
Again, all of this is even truer with presentations that are both virtual and recorded. So, it is well worth devoting a significant amount of your thinking, planning, and writing for any virtual event presentation to nailing the opening.
Here’s an example of an intro segment I did for a session on learner engagement for the California Society of Association Executives (CalSAE). I’ll leave it to you analyze how well I do – or don’t – practice what I preach in this one.
3. Adjust, Adapt, & Change As You Present
As important as the beginning of your presentation is, the real substance of it is in the content that follows. That means you need to maintain attendees’ attention, focus it on your most important points, and do what you can to support longer-term retention and application of your material.
When you think about it, that’s a tall order. The 30 to 60 minutes an average presentation lasts isn’t much time for achieving any real impact, and yet, it is also a very long period of time to keep the average person’s attention – especially in a world of cell phones, social media, and other distractions.
So, how you put your content together is critical. Just riffing to your slides will rarely cut it these days – especially if you want your attendees to actually learn something and retain what they learn.
First, get crystal clear about your objectives
Your starting point for achieving that is to get ultra-clear in your own mind about the objectives of your presentation. The objectives represent the strategy for the course and should drive decisions about content—what stays, what goes; what approaches are most useful, etc. In short, your objectives determine what it is most important for your learner to pay attention to in the course.
To clarify your objectives, ask, “How should attendees behave (differently) as a result of participating in my presentation?” Even if you see your presentation as primarily informational, be clear about what the learner should be able to do with the information. How will she apply it in the real world?
Keep in mind that only so much information can be absorbed and only so much change can be prompted by a single presentation. Most presentations suffer from a lack of clarity about objectives, too many objectives, or both. Exactly what will amount to too many objectives will depend on a range of variables – from the complexity of the topic to the background of the learners – but as general rule, it’s best to aim for achieving no more than two, possibly three objectives in a one-hour session.
Then, on to cutting and chunking
Once you have your objectives clear, focused, and reduced to a realistic number, you can move on to cutting and chunking.
As a presenter, you no doubt hope that your attendees will remember everything you share with them, but you also no doubt recognize that human beings have limited capacity for memory.
More technically, we can only hold so much information in our working memory, the type of memory involved with storing, focusing attention on, and manipulating information for a relatively short period of time, time measured in seconds.
Learning is a process of bringing information into working memory and then moving it into long-term memory—which, as far as we know, does not have any limitations.
The amount of working memory resources used for a task or in a situation is referred to as cognitive load, and, as a presenter, you want to do what you can to keep cognitive load at as manageable a level as possible for your attendees. This effort often starts with resisting the temptation to share everything you know about a subject and being disciplined about cutting content that is not truly relevant or germane for achieving your targeted learning outcomes.
To cut, go back to objectives: What is it truly necessary for the learner to know to achieve the desired outcomes? What is extraneous or perhaps “nice to know”?
Literally, list these out. It can help to know that “nice to know” information doesn’t have to totally ignored. You can still make this available in a number of ways—through resource pages, downloadables, and other types of “bonus” content. But get it out of the main flow of the content that is truly targeted to achieving the objectives.
Next, chunking longer content into shorter segments and allowing for brief pauses before continuing on from one segment to the next will also help to keep cognitive load at manageable level. Shorter segments—typically meaning no more than 10 minutes—are more in line with what our limited working memory can process and pauses allow time for that processing to happen.
At the highest level, your chunks of content should serve to focus attention on related concepts and information. These would typically be the larger sections of your presentation. In the presentation on learner engagement, I referenced in the video clip earlier, for example,
I chunked the content down into the following top-level segments:
- Defining Learner Engagement
- Requirements for Engagement
- Signals and Support of Engagement
- Accountability for Engagement
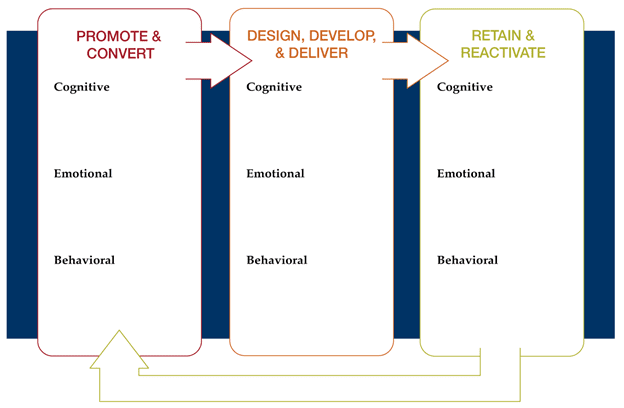
Within those major segments, I further chunked the content down into topics that I felt were most essential to those larger concepts. For example, in “Signals and Support of Engagement,” I addressed:
- Promote and Convert
- Design, Develop, & Deliver
- Retain & Reactivate
Finally, I chunked the content down further to each individual slide or snippet of video, being careful to try to focus on one essential point within each and to try to ensure that I stayed within the limits of working memory in each.
As you might guess, while there is science behind all that effort, there is also more than a bit of art and guesswork to it. I won’t claim to have gotten exactly right – in fact, in retrospect, I’m sure I didn’t. Few presenters do, but practice with chunking over time can dramatically improve your capabilities.
4. Mix Media & Content Types To Retain Engagement
As you are cutting, chunking, and sequencing your content you, of course, have options regarding the types of media you can use—text, images, audio, and videos, just to name some of the most common examples.
Varying the types of media, you use is almost always a good practice. It can help keep a presentation interesting, maintain attention, and ultimately, help your attendees learn and remember what you present.
But again, there are research-based rules that apply to doing it right. You need to be careful to use media in a way that does not increase—and ideally decreases—cognitive load.
In the context of a recorded virtual presentation, the three types of media you are most likely to use are text, audio, and images, so I’m just going to focus on those in providing some guidance. (I know – the whole presentation is a video, but that make video as ort of “meta” medium in this case, rather than something you use as an element of instruction.)
First, research indicates that including images to illustrate key points in your presentation can be an effective way to support learning. And sometimes, it’s the best way. If, for example, someone doesn’t know what a dragon fruit looks like and the goal is to for them to be able to buy one at the market, would it be more efficient to describe the fruit’s leathery slightly leafy pink exterior and its white flesh pitted with black seeds or show a picture?
The picture is more efficient in this case. And you should also consider when using an illustration, a photo, or a graph rather than a verbal description might reduce extraneous cognitive load when making a point.

But using multimedia effectively isn’t as simple as sprinkling a few photos or graphics throughout your slides – and you definitely don’t want to clutter up your presentation with too much media. There are research-based rules that should be followed. Based primarily on the work of Richard Mayer and Ruth Clark, here are four that are particularly important and useful for the average online presentation:
First, use only graphics images, text, and narration that clearly support learning goals. Images that are merely decorative or text that is tangential or supplemental, for example, will only increase cognitive load and make it harder for learners to absorb your key points.
Second, as you are narrating your presentation, avoid using both graphics and text at the same time. While there are exceptions, it generally increases the learner’s cognitive load to have to process both text and audio while also viewing a graphic.
Third, where appropriate, make use of arrows, highlighting, and other signals to draw attention to important information. This practice helps to focus the learner’s attention while also reducing the need for extraneous text.
Fourth, present in a conversational way. It can be easy, especially if you are presenting on a complex topic, to slip into jargon or academic, formal-sounding language. But research suggests that a more relaxed, informal approach can positively impact learning.
There are other rules – and many nuances – for using multimedia in the most effective to support learning. To the extent you want to go deeper into those, I’ve included a few supplemental resources at the end of this article. Just implementing the above suggestions, though, will go a long way toward ensuring you are making the most of the media you use in your presentations.
5. Repeat Often To Emphasize And Encourage Learning
If your goal is to help you attendees actually learn something – as opposed to purely entertaining or motivating them – then this point, in combination with the next one, is critical: you need to revisit key concepts and give attendees the chance to engage with them throughout your presentations.
You probably know from your own experience that being exposed to information only once rarely results in our remembering it. And a wealth of research supports the idea that repetition is essential for learning, but not just any repetition. The repetition must have two key qualities.
First, it needs to occur over time to be most effective. That is, there needs to be some space between the time when an attendee first engages with the material to be learned and each subsequent time. So, plan to revisit your most essential ideas and concepts at different points in time throughout your presentation. As I’ll discuss soon, it’s also a good idea to provide attendees with ways that they can revisit key ideas and concepts on their own at multiple times following your presentation.
Second, repetition needs to involve some effort if you really want the repeated material to stick. The attendee needs to re-engage with the material cognitively and—in cases where the learning involves a skill or other observable behavior—physically.
I’ll come back to the importance of effort momentarily, but, for now, it’s essential to understand that repetition is a way to re-focus attention to the most salient material, the material that most supports the objectives of your presentation. For that reason, it’s critical to plan out the repetition and review of key concepts in different ways throughout the presentation.
Along these lines, it’s worth noting that one of the desirable outcomes of the cutting process I covered earlier is to ensure you preserve sufficient time for revisiting material—rather than simply introducing more and more new material. Winding back even further, that same thinking applies to objectives: given the need to repeat key material throughout your virtual presentation, there are really only so many objectives you can address.
6. Provide for Participation
Now, let’s return to that idea of repetition needing to be combined with effort on the part of the attendee. Even in on-demand, recorded presentations, participation from attendees is possible and desirable—but clear opportunities have to be called out and supported.
So, first …
Prompt and pause
As obvious as it may seem, an often-overlooked aspect of participation is that you usually must ask for it and then – here’s the kicker – actually build in sufficient time for it. That means including silence during live presentations (including replays with chat) or – more common in completely on-demand presentations – having attendees hit the pause button to allow time for whatever it is you ask them to do.
Here’s a brief example of me allowing for some silence in a virtual presentation. Note, too, that I use a tactic for commenting on chat even though this is a recorded presentation, and I can’t actually know in advance what will be said in the live chat that occurs during the presentation replay.
Not rocket science, obviously – just one of those things you have to plan for and execute. (Which goes back to the points above about scripting, objectives, etc.)
Yes, doing something like this can feel a bit awkward, but it can really help tremendously with learning and memory. A fundamental problem with most presentations is that the learning evaporates once the learner exits the physical room or online session. To combat forgetting, we have to encourage and guide attendees to “practice” with the material and prompting, and pausing create the opportunity to do that.
I’ll note, too, that prompting and pausing are a way of focusing attention—signaling to attendees what is important and giving them an opportunity to engage and re-engage with that important material.
Of course, once you have focused or re-focused attention in this way, you have to provide the actual participation opportunity, which leads to my next point.
Mix it up
There are many ways to enable participation in a virtual presentation and most of them are not especially complicated. You don’t need fancy animations or elaborate games.
Simple methods like reflection questions, contributions to chat, quizzes, challenge problems, or even assignments to be completed later can be quite effective.
Using a variety of methods throughout your presentation can help maintain learner interest. Just as importantly, if you give learners the opportunity to engage with the material in a variety of ways, you’ll be supporting different aspects of learning.
A simple “pop quiz” (i.e., pose a question and pause momentarily to let attendees think about the answer) might help to bolster memory for a key concept; a reflection question might provide a means of “elaboration”—challenging the attendee to think through how the concept applies to her own situation—to something she commonly does back at work, for example. A suggested assignment could then challenge her to apply one or more key concepts when she is actually back in her work context.
To go back to the earlier point about spacing and repeating, it’s highly effective to provide for repeated, but varied types of participation throughout your presentation. You might, for example, pose a problem or challenge as a way of introducing a key concept, and then return to the same concept later, offer a solution, and present a reflection question.
One key in mixing your methods in the most meaningful way is get your attendees to make an effort—to retrieve, to elaborate, to rehearse, to apply, to make their own connections between the material you share and their own contexts. A wealth of research suggests that this kind of effort is essential for making learning stick.
So, as you deliver the presentation, overtly tie your material back to the outcomes and positive change that attendees are seeking. But even more importantly, help attendees – through participation – make such connections for themselves. They’re better able than you are to make the “why” of any learning experience more meaningful and specific. You just need to encourage them and – through prompting and pausing – give them the cognitive space to do so.
7. Pave the Path Forward
I’ve now covered most of what happens during the time that attendees are actually present for your virtual presentation, but what about what comes after?
While rates of forgetting can vary widely from person to person, most of us will forget most of what we hear and see in a presentation within a matter of weeks, if not days or – sadly – hours. So, if you really want your attendees to retain and use what you present to them, your presentation is just one step in a longer journey to fully absorbing and mastering the material you cover.
To ensure that journey is ultimately successful, it’s important to help learners understand the need to revisit and continue to engage over time with the key concepts and ideas covered in your presentation. And it’s also important to provide them with or help them find opportunities for doing this.
So, to wrap up, let’s take a look at how you can help your attendees create a future in which the learning you’ve facilitated sticks and gets put into action.
Provide a map
First, taking the “journey” metaphor to heart, provide your learners with a map. Or, even better, co-create a map with them.
By “map,” I mean a concrete resource like a document or a web page where you suggest clear steps or actions learners may take over time, starting immediately, to ensure that they retain and apply what they have learned.
Depending on the nature of your virtual presentation, these could include anything from trying out a particular method or procedure in different situations. Or it might mean asking learners to make daily journal entries for a period of time to note down when they have applied one of your key concepts and the results they got.
That’s your part of the map.
But it’s also useful to ask attendees to add their own elements to the map – whether by creating their own supplemental resource or providing them with an editable version of whatever you provide. While you probably have a great deal of expertise or experience in whatever topic you are presenting, there’s no way you can know where each attendee is trying to go. The destination – the why, the goal – will vary some from attendee to attendee.
By asking learners to co-create the map – essentially, to identify what they will do differently in the future as a result of what was covered in your presentation – you offer them the ability to personalize the learning experience, to make it as relevant as possible in their specific contexts.
Provide resources
Along with the map, provide resources to support the learner along her journey, as she pursues the actions on the map. These might include things like reference and tip sheets, checklists, self-checks that learners should complete at established intervals, or links to additional materials – articles, books, videos – that help reinforce or expand upon the most essential elements of your virtual presentation.
Again, these can be put into a document or posted to web page.
Encourage accountability
Finally, for the map and resources to have an impact, they have to be used.
So, encourage learners to make clear, measurable commitments to themselves – for example, by setting dates by which they will accomplish items on the map – and to find accountability partners—in their workplace or within professional networks or communities they’re part of to help hold them to applying what they learn.
As part of supporting accountability, you may even want document concrete ways in which a colleague and/or manager can best support accountability—one of the resources you provide may help support this. You might even create a brief guide for accountability partners—i.e., what do you want them to do, when, why?
Improving Virtual Presentations Is a Process
One of my mantras is that learning is a process, not an event. Just like a single virtual presentation will have only so much impact on your attendees, reading this article will only have so much impact on your presentation. Everything discussed here takes a lot of practice over time to do really well.
But, of course, every journey begins with a single step.
Just becoming conscious and intentional (or, if this is familiar ground, more conscious and more intentional) about what goes into more effective, engaging virtual event presentations is an essential step. Beyond that, continuing to review, practice, and improve at everything covered here over time will ensure that your virtual presentations stand out and deliver real impact.
One last note: while I’ve focused on improving virtual event presentations here, everything I have covered applies to creating content for online courses and, indeed, for most methods of sharing your expertise and helping others learn.
So, I encourage you to bookmark this page, share it with friends and colleagues who might benefit from the information offered here, and return to it periodically to reinforce your own learning.
Additional Reading
Here are some additional resources you may find helpful. (I plan to add to these over time – just one more reason it is useful to bookmark and share this page as a reference).
John Medina’s Brain Rules is one of the main sources for the rule of thumb for chunking content into segments of no more than 10 minutes, As Medina writes:
Audiences check out after 10 minutes, but you can keep grabbing them back by telling narratives or creating events rich in emotion.
You can download all 12 brain rules at the link above.
Chunking Informational for Instructional Design
eLearning Coach Connie Malamed provides some good, concise tips on how to chunk content to ensure you support learning.
How to use Mayer’s 12 Principles of Multimedia
To keep things simple and actionable, I touch on just a few key principles of multimedia above. If you want to go deeper, this article gives a good overview of twelve principles based on the research of educational psychologist Richard Mayer.
Spacing Learning Events Over Time: What the Research Says
This classic research round-up from Dr. Will Thalheimer makes clear how powerful “spacing” is.
Frequently Asked Questions About Virtual Presentations
1. Are virtual presentations harder than in-person presentations?
Yes. Virtual presentations require more intentional structure and clarity because presenters can’t rely on physical presence, eye contact, or real-time audience energy.
2. Do virtual presentations work better live or pre-recorded?
Both work, but for different goals. Live sessions support interaction and urgency, while pre-recorded presentations offer better pacing, polish, and long-term reuse.
3. What platforms are best for delivering virtual presentations?
Common options include Zoom, Microsoft Teams, and Webex, but effectiveness depends more on design than the tool.
4. Should virtual presentations always include slides?
No. Some of the most engaging virtual presentations use minimal slides or start with the presenter on screen to build connection before introducing visuals.
5. How do you keep people engaged when cameras are off?
Engagement comes from prompting action—reflection questions, pauses, and tasks—not from seeing faces on screen.
6. What’s the biggest mistake presenters make in virtual presentations?
Trying to replicate an in-person talk instead of designing specifically for the limits and strengths of the virtual environment.
7. How much content should be cut for a virtual presentation?
Most presenters should cut at least 30–50% of what they’d include in an in-person session to avoid overload.
8. Do virtual presentations reduce learning effectiveness?
Not inherently. When designed around attention, pacing, and participation, virtual presentations can be just as effective—or more so—than live sessions.
9. How does cognitive load affect virtual presentations?
Because screens increase mental effort, presenters must reduce unnecessary information and visuals to avoid overwhelming working memory.
10. Can virtual presentations be reused in courses or coaching programs?
Yes. Many effective online courses and coaching programs are built around recorded virtual presentations paired with reflection, practice, and follow-up resources.
Table of Contents