
TL;DR – How to Create an Online Course That Sells
An online course is a structured learning experience focused on solving a specific problem and delivering a clear transformation. Unlike random tutorials, it takes learners from point A to point B with a defined outcome.
🔑 10 Steps to Build Your Online Course
Step 1: Pick a Profitable Idea Choose a specific problem you can solve and validate it with the POWER Test (Problem, Outcome, Wisdom, Evidence, Revenue).
Step 2: Design the Learner’s Journey Map the transformation from point A to point B. Break it into 3–6 modules that become the backbone of your course.
Step 3: Build a Minimum Viable Course (MVC) Create a simple workshop, mini-course, or live session that teaches the essentials to test demand and collect feedback.
Step 4: Co-Create With Beta Students Invite engaged learners into a discounted beta. Build modules alongside them, refine lessons, and gather testimonials.
Step 5: Build the Full Curriculum Expand your validated framework into structured modules, lessons, quizzes, and templates that guide learners step by step.
Step 6: Record and Produce Content Use simple equipment to record clear, short lessons. Add worksheets and templates for application — focus on clarity, not perfection.
Step 7: Choose the Right Platform Select a platform to host your course, process payments, and manage students. Thinkific works best for most; Kajabi for advanced users; LearnDash for WordPress setups.
Step 8: Build Community and Engagement Add a private group, live Q&As, or peer feedback to keep students motivated. Remember: people buy content, but stay for community.
Step 9: Price Your Course Strategically Set your price based on the transformation you deliver, not just the hours of content. Use tiers, testing, and a value ladder approach.
Step 10: Launch and Iterate Run a clear launch campaign with webinars, emails, and testimonials. Track results, refine your messaging, and relaunch stronger each time..
Traditional instructional design uses ADDIE (Analyze, Design, Develop, Implement, Evaluate). For edupreneurs, I recommend a leaner, faster alternative — the POWER Test + MVC approach — which gets you to results quicker.
The Benefits of Creating Online Courses
Benefit #1: Creating an online course helps you scale your knowledge into passive income.
Benefit #2: Online courses give you global reach and the power to impact lives worldwide.
Benefit #3: They diversify your revenue streams and attract new customers.
Benefit #4: Courses give you flexibility and freedom to work from anywhere.
Benefit #5: Teaching positions you as an authority and builds your credibility.
Which Online Course Platform Is Worth Using?
Thinkific: Best overall for most creators.
Kajabi: Ideal for all-in-one growth + email marketing.
LearnDash: Best for hosting on your WordPress site.
Don’t fall for the gloom and doom hype around online courses, they’re not going anywhere.
Recent studies show the online learning market is exploding and projected to reach $842 billion by 2030. Another report found that online courses were the #1 revenue source for 70% of eLearning professionals earning $100K+ per year.
The truth is, we’re living in one of the most transformational times in recent history. With AI reshaping industries and entire professions, more people than ever are looking to acquire new skills, future-proof their careers, and create new income streams.
And that’s exactly where the opportunity lies for edupreneurs.
If you’ve achieved something in your profession, mastered a skill, or even found a way to solve everyday problems, whether it’s helping people make more money, grow in their careers, live healthier, or simply enjoy a hobby, you can package that knowledge into an online course.
Not only will it help others, but it can also become a powerful way to monetize your expertise.
I’ve been in this industry for over two decades, working with both businesses and solo creators, and I’ve seen one common mistake: people overcomplicate course creation.
In reality, if you follow a clear framework, building an online course is much simpler than it looks.
That’s why I’ve put together this step-by-step guide, sharing my proven process for creating courses that deliver real value and sell like hotcakes.
Let’s dive in.
Already have a course? Read our sales guide for courses
What Is an Online Course?
An online course is a structured learning experience focused on a specific topic that delivers a well-defined outcome.
Unlike a random YouTube tutorial, it’s intentionally designed to take learners from point A to point B, whether that means mastering a skill, solving a problem, or reaching a personal or professional milestone.
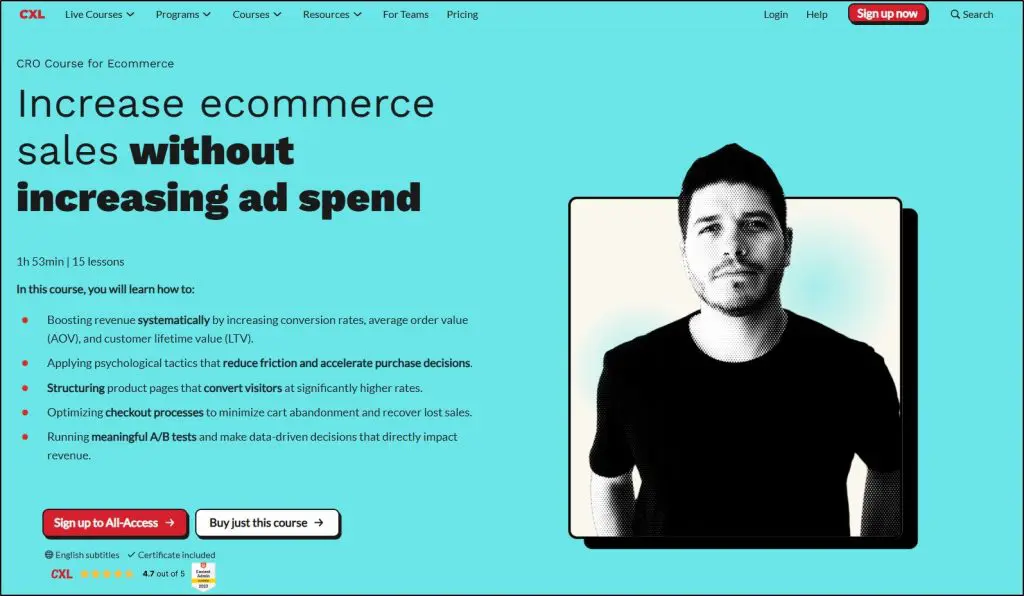
For example, here’s an online course about increasing ecommerce sales without increasing ad spend (specific, well-defined, and result oriented.)
Here’s another example of an online course from a completely different niche.

Just goes to show how people create and sell courses in all kinds of niches and topics that you don’t generally associate with online learning.
Learners love online courses because they can access knowledge from the world’s best teachers no matter where they live, and move through it at their own pace.
For edupreneurs and professionals, courses are a powerful way to deliver your knowledge in a structured way once, then keep making an impact across the globe, change thousands of lives on repeat, earn money, and be recognized as an expert.
In the early days, online courses were mostly just video lessons with a few worksheets and templates. But in the age of ChatGPT, Gemini, Claude, and other generative AI tools, information alone isn’t enough because anyone can get facts and summaries instantly.
What learners crave and what makes modern courses truly valuable is active community participation, interaction, and live sessions that keep them engaged and supported. That’s where real transformation happens.
Think of an online course as your knowledge packaged into a repeatable system. It can include audio/video lessons, worksheets, quizzes, live sessions, community support, or any mix of formats that helps your students actually learn and apply what you teach.
The beauty of online courses is that they’re flexible. Learners can take them anytime, anywhere, and you can design them to be completely self-paced or run in cohorts with live interaction. That’s why 98% of people who complete their first course say they plan to take another. The demand is real and growing.
And here’s the part most people overlook: an online course doesn’t have to be massive. It can be a one-hour mini-course, a multi-day deep dive, or even a masterclass that becomes the centerpiece of your business. The key is clarity—what problem does your course solve, and who does it help?
The Benefits Of Building And Selling Online Courses
With the simple demand and supply rule, if people want knowledge, and you have it, you should be sharing it.
Right now, millions are searching for ways to upskill, grow, and solve problems, and your expertise could be the answer.
In fact, the benefits of building and selling courses are so strong that you’d need a pretty convincing reason not to do it.
Here are five of the biggest benefits of building and selling online courses.
1. Scalability and Passive Income
Courses allow you to teach once and sell forever. Unlike one-on-one coaching or consulting where your time limits your income, online courses scale infinitely.
You record your lessons once, and platforms handle enrollment, delivery, and payments. That means your knowledge keeps working for you—day and night—without requiring you to show up live every time.
For example, if you price your course at $99 and sell it to just 1,000 customers, that’s $99,000 in revenue, all from the same product, with no supply chain, shipping, or physical inventory to worry about.
That’s why online courses are one of the most scalable business models in the world.
Even better, online courses naturally fit into a value ladder. Each course solves a specific problem and positions students for the next stage of their journey.
You can start them with a low-ticket introductory course, move them into deeper, higher-value programs, and eventually offer premium consulting or coaching.
This ladder not only maximizes revenue but also strengthens your relationship with learners at every step.
2. Global Reach and Impact
Millions of learners across the world are turning to online courses to stay relevant, build careers, or simply improve their lives.
What might feel like basic knowledge to you could be advanced, life-changing insight for someone on the other side of the globe. By creating courses that solve real problems, you’re making a direct impact.
Many learners who can’t afford higher education or don’t have access to advanced degree programs rely on online courses to learn specific skills that help them earn a living.
And the ripple effect is enormous. Thousands of students have taken online courses, applied what they learned, and then passed that knowledge on in their communities by teaching, mentoring, or starting businesses of their own.
In other words, you’re not only making money, you’re changing lives and leaving a legacy through your expertise.
Benefit #3: Diverse Revenue Streams
Building courses is one of the smartest ways to diversify your business. Instead of relying on a single income stream, courses add a steady layer of revenue that works in the background while you focus on your main work, whether that’s consulting, freelancing, or running an e-commerce business.
Courses also act as the perfect entry point for new customers. If your core service or product requires a significant investment, a course offers prospects a low-commitment way to learn the basics and try your expertise.
Many times, those same learners come back for your higher-end offers when they realize they need deeper help to apply what they’ve learned.
Meanwhile, the course itself continues generating passive income, quietly growing your bottom line without needing constant attention. It’s like having a digital asset that introduces you to new clients, nurtures trust, and earns you money, all at the same time.
Benefit #4: Flexibility and Freedom
Online courses are one of the few business models that truly give you location independence. You can create them anywhere, launch them from anywhere, and earn while traveling the world. No classrooms, no fixed office, no geographic limits, just your laptop and an internet connection.
Even better, the more you travel and meet new people, the more fuel you add to your course business.
Fresh perspectives, new knowledge, and real-world stories all become material you can bring back to your audience. This not only enriches your content but also gives you new angles to market and sell your expertise.
For example, many creators I’ve worked with started by teaching in their local market, but after traveling and networking abroad, they expanded their courses globally, often doubling or tripling their student base.
Courses don’t just free you from a location, they open the door to unlimited opportunities.
Benefit #5: Authority and Credibility
Teaching automatically positions you as an authority. The moment you step into the role of instructor, you become the knowledge giver and your audience becomes the consumer.
That dynamic creates a natural psychological balance where learners view you on a pedestal, silently recognizing you as the expert.
This credibility spills over into every part of your business. Whether you’re selling consulting, freelancing services, or physical products, your courses serve as proof that you know your stuff.
They validate your expertise in a way no sales pitch ever could. And once people see you as an authority, trust comes easier, conversions get higher, and opportunities open up far beyond just course sales.
10 Steps to Build an Online Course That Sells
As I said, creating a course isn’t as complicated as you might think. If I were to start from scratch, here are the steps I’d follow to build a successful online course.
Step 1: Pick a Specific and Profitable Course Idea
A course isn’t meant to be a full degree program that covers everything under the sun. Instead, it’s a structured learning experience focused on one very specific problem, designed to deliver one clear transformation.
If your idea is too broad, your course will overwhelm learners. If it’s too vague, no one will buy it.
So how do you know if your idea is strong enough?
I use what I call the POWER Test. It helps you judge whether your idea will actually work in the real world and sell.
P — Problem Fit
Every course must solve a specific,well-defined, painful problem. People don’t buy “knowledge”; they buy solutions.
Saying “Learn Photoshop” is too broad. Saying “Design social media graphics in Photoshop without prior design experience” is a clear problem fit. Learners instantly see the transformation and outcome.
O — Outcome & Audience Fit
Once you know the problem, define who you’re solving it for and what outcome they’ll achieve. Are they beginners, intermediate, or advanced?
For example, “Beginner’s Guide to Video Editing” looks very different from “Advanced Cinematic Editing Techniques for Filmmakers.”
The clearer you are about audience and outcome, the easier it is to create and market your course.
W — Wisdom (Expertise Fit)
You don’t need a PhD or decades of experience to deliver value, but you do need to be a step ahead of your learners.
Have you achieved results yourself? Helped a client? Built a system that others could replicate? That’s enough.
For example, if you’ve grown a TikTok account from 0 to 50,000 followers, you already have valuable wisdom that beginners will pay to learn.
E — Evidence of Demand
Expertise is great, but you also need proof that people want this course. Look for demand signals: are people asking questions in forums, Googling the problem, or enrolling in similar courses? Are there any books on Amazon about this topic?
Use tools like Google Trends, Reddit, or even AI tools like ChatGPT and Perplexity to surface common questions and pain points. If real people are struggling with the problem, you’re on the right track.
R — Revenue Potential (Willingness to Pay)
Finally, you need to know if people will pay. Check competitor pricing, run a small paid workshop, or try pre-selling your course idea.
For example, if 10 people pay $50 for a workshop, that’s real validation. If they only sign up when it’s free, you may need to rethink your positioning or audience.
When your idea passes the POWER Test (Problem, Outcome, Wisdom, Evidence, Revenue), you’ve got a course idea that’s specific, profitable, and built to sell.
Step 2: Design the Learner’s Journey
You must be clear about the transformation your course offers. People don’t buy videos or worksheets, they buy the change from their current state to their desired state.
What is that transformation? What’s the journey from Point A to Point B?
For example: Before taking a freelance writing course, a student may be stuck sending cold pitches that never get replies. After completing the course, they’re landing 3–5 high-paying clients using a proven system. That’s a transformation learners will pay for.
Your job is to craft that journey.
How will you take your student from A to B? What topics, skills, or steps do they need to learn to achieve the promised transformation?
Those topics become your modules, and the detailed steps inside each topic become your lessons.
Here’s how to map it out:
- Define before and after: Write down your learner’s current struggle and the outcome they want.
- Set key outcomes: Break that transformation into 3–6 big milestones. These form your modules.
- Sequence logically: Arrange modules in the right order so each step builds on the last.
- Add checkpoints: Use quizzes, templates, or small wins to keep learners engaged.
- Enhance with AI: Tools like ChatGPT or Gemini can suggest possible learning paths you can refine.
Using our freelance writing example, the journey might look like this:
- Module 1: Position yourself as a professional writer for a specific niche.
- Module 2: Build a starter portfolio (even without paid work).
- Module 3: Find and pitch clients with a simple outreach system.
- Module 4: Build a brand that attracts clients on autopilot
- Module 5: Deliver projects that wow clients and get repeat work.
This journey map shows how your student moves step by step from cold-pitch frustration to consistent freelance income, and that’s what makes your course compelling.
Step 3: Build a Minimum Viable Course (MVC)
Before spending weeks building a full course, test if people actually want it. The simplest way is to create a minimum viable course, a stripped-down version that delivers one specific outcome.
You can launch it as a mastermind, a free workshop, or a short mini-course.
How to do it:
- Focus on must-haves, not nice-to-haves. Take the most valuable part of your course idea and teach it in a focused session. For example, if it’s about copywriting, run a workshop on frameworks that instantly boost conversions with real examples.
- See if people engage. If learners show up, ask questions, or request more, that’s proof of demand. You can then expand it into a complete course that takes students from scratch to mastery.
- Use AI to speed things up. ChatGPT or Gemini can help you create worksheets, quizzes, or even a PDF guide around your session. Offer these as freebies or bonuses to add value without extra effort.
The goal is simple: validate demand before you go all in.
Step 4: Co-Create With Beta Students
Once your minimum viable course shows demand, the next step is to bring real students into the creation process.
Instead of building in isolation, invite your most engaged workshop or mini-course participants into a discounted beta program (typically 60–70% off).
This way, you’re building with your audience, not just for them.
Here’s how to do it:
- Hand-pick early adopters. Choose participants who asked smart questions, engaged actively, or gave useful feedback in your MVC. They’re your best beta students.
- Offer a clear deal. Give them a deep discount in exchange for their feedback, patience as you build modules, and permission to use their testimonials.
- Build alongside them. Release one module at a time, gather feedback, and adjust before moving forward. This keeps content practical and ensures every lesson solves a real problem.
- Collect social proof. Beta students become your first testimonials, case studies, and success stories — the most powerful marketing assets you’ll ever have.
Think of beta students as both learners and co-designers. They help you validate what works, point out what’s missing, and ensure your content creates real impact.
In return, you get confidence, proof, and marketing fuel before a public launch. It’s the fastest way to build a course that sells and transforms lives.
Step 5: Build the Full Course Curriculum
Once you’ve validated your minimum viable course and got beta testers on board, it’s time to turn your idea into a complete curriculum.
This is where you move from a rough framework to a fully fleshed-out learning experience.
Start by revisiting everything you have: feedback from your MVC launch, comments from beta testers, and the original transformation you promised.
Put it all together so you’re crystal clear on the outcomes your course must deliver.
This is also where AI can save you weeks of work.
Feed ChatGPT, Gemini, or Claude as much context as possible — your MVC content, your tone, your audience, and the transformation you’re aiming for.
Then ask it to generate a sample outline with:
- Course Modules (big milestones)
- Lessons (and the nature of each — video, text, activity, etc.)
- Quizzes or checkpoints
The AI’s draft won’t be perfect, but it gives you a solid starting point. From there, you can trim, reorder, and refine until it feels like your course.
Finally, share the draft outline with your beta testers.
Ask: Does this cover all the steps you’d need to get from A to B? If they agree, you’ve got a curriculum that’s not just complete, but validated by real learners.
Step 6: Record and Produce Your Content
Most creators jump straight to recording lessons and wonder why their courses don’t sell.
But you’ve already done the hard work by validating your idea, mapping the journey, and building the curriculum.
That means recording is no longer guesswork. It’s simply executing the plan you already know works.
This step is about clarity, not perfection.
Your students don’t expect a Hollywood production. What they need is content that’s understandable, engaging, and directly tied to solving their problem. Focus on communicating your knowledge clearly, not making every frame flawless.
Get AI’s feedback at every stage.
Share your draft scripts, slides, or lesson plans with ChatGPT or Gemini and ask: Does this speak to my learner’s pain points? Where might they lose interest? How can I add a hook?
AI can suggest examples, reframe explanations, and highlight angles that keep students hooked. Feed it your audience’s struggles, and it will help you weave those pain points into your delivery.
Remember these rules while recording your content.
- Use simple gear. A smartphone + an affordable mic in a quiet, well-lit space is enough. Read our detailed recording equipment guide for specific recommendations
- Keep it bite-sized. 5–10 minutes per lesson is ideal; break complex topics into smaller chunks.
- Don’t chase perfection. Clear audio and focused delivery beat polished but lifeless videos.
- Add support materials. Worksheets, templates, or transcripts make your lessons more actionable, and AI can generate the first drafts for you.
- Stay human. Talk as if you’re explaining to one person, not a crowd. That personal tone builds connection.
As you record a module, release it to your beta users right away.
Ask them: Does this answer your questions? Does it prepare you for the next module? Their feedback will help you refine your content before moving forward. This way, each lesson gets better as you build.
Step 7: Choose the Right Online Course Platform
An online course platform lets you host your course, enroll students, process payments, manage engagement, and track progress. It’s a complete e-learning solution that delivers your content effectively and gives learners the right virtual environment to succeed.
The trick is not to overthink this step.
You don’t need every feature under the sun. You just need a reliable platform that makes it easy for you to teach and for your students to learn.
My recommendations:
- Thinkific → Best overall. Simple, flexible, and built specifically for online courses.
- Kajabi → Ideal if you also need advanced email marketing, funnels, and automation.
- LearnDash → Perfect if you’d rather host your course on your own WordPress site instead of a third-party platform.
There are plenty of other strong options too and I’ve covered them in detail in our complete online course platform guide.
Don’t get stuck comparing endlessly. Choose the one that best fits your current stage, launch your course, and improve as you grow.
Step 8: Build Community and Engagement
You can’t create a successful course if it only offers information because AI has made information cheap and accessible.
Anyone can ask ChatGPT or Gemini and get 70–80% of what they need. That means courses built only on theory don’t feel as valuable anymore.
What people truly crave now is personal connection and real interaction with credible authorities in their niche and a community of peers walking the same path. This space gives them a chance to share struggles, learn from others, and get direct feedback on their situation.
That’s why I believe every course today must include a community element.
Thankfully, most modern course platforms (Thinkific, Kajabi, LearnDash) offer built-in community features.
And you don’t need to be available 24/7. Weekly Q&A calls, monthly live sessions, or quarterly guest events are enough to keep students engaged.
People buy your course for the info, but they stay for the community. And that community becomes a growth engine.
You can offer it as an additional monthly membership, and your students, who feel supported and connected, will also become your best word-of-mouth marketers, bringing in new members without extra ad spend.
Create the initial buzz in your community by asking your beta users to create threads, ask questions, and engage with each other. These threads will become the foundation of your discussions as more learners join your course.
Step 9: Price Your Course Strategically
Pricing can make or break your course business. It doesn’t just decide how much money you make, it shapes how people perceive your expertise.
Price too low, and your course feels cheap or “beginner-grade.” Price too high without proof, and people won’t trust the value. The key is to set a price that reflects the real transformation you’re offering, not just the number of hours of video.
Think about it: if your course helps someone land a promotion or save 20 hours a month, that outcome is worth far more than the course materials themselves.
That’s why I always tell creators not to price based on how long it took you to record videos, price based on the ROI for your students.
Here’s how to do it:
- Start with strategy: Be clear on your goal — do you want reach, authority, or premium positioning?
- Work backwards from value: Calculate what the transformation is worth to your students and set a fair price around that.
- Offer tiers: Add a basic, standard, and premium package to serve different budgets.
- Anchor with premium: Introduce a higher-priced option to make your main offer look more affordable.
- Test and adjust: Pre-sell your course or run a beta to validate price. Raise it over time — most creators can charge 10–25% more without losing sales.
To simplify this, I’ve built a free pricing calculator and a detailed course pricing guide that gives you ballpark figures based on these principles.
Remember the value ladder we discussed earlier? You can tie your course pricing with your value ladder.
For example, you might start with a $99 beginner course that introduces your methods. The students who see results naturally move up to your $499 advanced program.
From there, your most committed learners often step into a $2000+ coaching or consulting package.
Each tier builds trust, delivers results, and maximizes revenue.
Step 10: Launch Your Course and Iterate
You’ve validated your idea, built your course, and tested it with beta students. Now comes the make-or-break moment: launch.
A successful launch isn’t just opening the cart, it’s a carefully staged event that builds anticipation, creates urgency, and converts interest into sales.
Here’s what I’ve learned from running six-figure launches:
- Warm up your audience weeks in advance. Don’t wait until launch week to show up. Share free value on social, host a mini-challenge, or drip short “teaser lessons.” When you finally open doors, people should already be primed.
- Lead with a free event. A webinar, masterclass, or live workshop is your conversion engine. Teach something valuable that solves a small piece of the big problem. End with your course as the natural next step.
- Use stories, not just sales pages. Share beta student results everywhere — in your emails, on your landing page, and during live sessions. People buy transformations, not modules.
- Stack urgency. Open cart and close cart windows work. Use bonuses that expire mid-launch, offer limited seats for live coaching, or raise prices after the first cohort. Urgency moves fence-sitters.
- Track everything. Install your Facebook Pixel, Google Analytics, and email tagging before launch day. Data tells you which ad sets work, which emails convert, and where drop-offs happen.
- Don’t skip affiliates and partnerships. A handful of well-chosen affiliates can double your reach. Look for people who already have your audience’s trust. Give them a plug-and-play promo kit.
- Expect iteration. Your first launch won’t be perfect — mine weren’t either. Treat it like a paid test. Collect feedback, tweak your messaging, improve your funnel, and relaunch. Each round gets easier and more profitable.
Think of your course like software: launch, test, refine, relaunch. That’s how successful creators play the long game.
Sample 2-Week Launch Calendar
Pre-Launch Warmup (Days –14 to –7)
- Share free content on social (mini-tips, short videos, carousels).
- Tease your upcoming free event (webinar/masterclass).
- Open a waitlist or early interest form to segment your most engaged leads.
Day –6 to –3 (Build Anticipation)
- Announce your free workshop/masterclass.
- Send 2–3 reminder emails + post across channels.
- Run engagement ads (video views, lead ads) to warm up cold traffic.
Day –2 (Value Drop)
- Release a short “behind the scenes” video about your course journey.
- Share beta student results or testimonials.
Day 0 (Launch Event)
- Host your live webinar/workshop. Teach a real, valuable skill.
- End by presenting your course as the next step.
- Open cart immediately after the event.
Day 1–3 (Early Cart Push)
- Send a replay email of the webinar.
- Highlight the transformation your course delivers.
- Add an early-bird bonus (e.g., extra module, 1:1 call, or template).
Day 4–6 (Mid-Cart Engagement)
- Share case studies, success stories, or Q&A.
- Send emails tackling objections: “Is this right for me?” “What if I don’t have time?”
- Do a live Q&A or Instagram/YouTube Live to address hesitations.
Day 7 (Final Push)
- Morning email: “Cart closes tonight.”
- Afternoon: Highlight success stories + bonuses expiring.
- Evening: Send last-chance reminder (this one always drives the biggest spike).
Don’t be afraid to repeat key messages. Most buyers decide in the last 48 hours — your job is to remind them of the transformation, not bombard them with new info.
Are You Ready To Create Your Online Course?
What you’ve just read is a high-level roadmap built on the same frameworks I’ve used to launch successful courses, both for myself and for my clients.
But here’s the truth: every launch is its own learning experience.
Things won’t go exactly as planned. You’ll run into surprises, uncover insights you didn’t expect, and adjust along the way.
This guide gives you a proven process to follow, one that covers the critical steps most creators miss. Use it as your guideline, but understand that the real growth happens when you put it into practice.
Nothing teaches you how to launch a course better than actually launching one.
Start small, take action, and keep refining.
Your first course doesn’t need to be perfect, it just needs to solve a problem, help people, and get you in the game.
The rest you’ll learn by doing.
Frequently Asked Questions (FAQs)
1. How long should an online course be?
There’s no fixed rule, but most successful courses run 2–6 hours total, broken into short 5–10 minute lessons. What matters is delivering the promised transformation, not hitting a time target.
2. Do I need fancy equipment to record my course?
No. A smartphone with a good microphone and natural light is enough to start. You can upgrade later if needed.
3. Should I offer my course as self-paced or cohort-based?
Self-paced works for evergreen sales, while cohort-based adds accountability and engagement. Many creators start self-paced, then layer in live elements.
4. How do I protect my course from piracy or unauthorized sharing?
Most platforms (Thinkific, Kajabi, LearnDash) include security measures like video streaming instead of downloads. You can also watermark PDFs and restrict login sharing.
5. What if I don’t have an existing audience?
Start by building authority on platforms like LinkedIn, YouTube, or Twitter. Run free workshops or challenges to attract your first 100–200 email subscribers before launching.
6. Should I create my own platform or use a marketplace like Udemy?
Marketplaces give you exposure but control your pricing and student data. Hosting on your own platform builds your brand and long-term business.
7. How do I keep students engaged until they finish the course?
Add quizzes, worksheets, small wins, and community accountability. Regular check-ins or drip-feeding content also boost completion rates.
8. What’s the best way to market my course after the first launch?
Use evergreen funnels: lead magnets, email sequences, retargeting ads, and partnerships. Keep running free workshops as a top-of-funnel driver.
9. Can I sell more than one course at a time?
Yes, but focus on one flagship course first. Once that’s proven, you can build a product ladder — intro course, advanced program, and coaching.
10. How do I handle refunds and guarantees?
Offer a clear money-back guarantee (7–14 days). It reduces buyer hesitation and builds trust. Just set boundaries to prevent abuse.
Table of Contents
Related Posts
What Is Instructional Design In E-Learning: Process, Tips & Examples (2026)
13 Proven Ways To Increase Online Course Completion Rates (2025)
The Big List of Free Training for Course Creators