
TL;DR – What Is ScreenPal and Should You Use It?
ScreenPal (formerly Screencast-O-Matic) is a screen recording, video editing, and hosting tool built for educators, course creators, and training teams. You record your screen, webcam, or both, edit the footage, add captions and interactive elements, then host and share it, all without leaving the platform.
Core ScreenPal Features
Screen and webcam recording with drawing tools
Full video editor with text, shapes, overlays, blur, and transitions
AI tools including auto-captions, text-to-speech narration, video generator, and quiz creation
Storyboard and script builder with teleprompter
Screenshot capture with annotation tools
Hosted video channels with privacy controls
Interactive quizzes, polls, and call-to-action buttons
ScreenPal Pricing and Free Plan
Free: $0/month
Deluxe: $4/month (billed annually)
Max: $10/month (billed annually)
Team Business: $8/user/month (min. 3 users)
Best For: Course creators who produce tutorial and lesson videos regularly and want simple recording, editing, and hosting in one tool
Not Ideal For: Course creators who need advanced multi-track audio editing or motion graphics for high-production video content
Try ScreenPal For Free
ScreenPal, formerly Screencast-O-Matic, might not be the first name that comes to mind when you think of the best screen recorders and video editors.
However, once you start using it, you realize it offers impressive video recording, editing, screencasting, and screen capturing features for online course creators, all in a web-based interface.
I’ve been using it for several years and believe it’s among the most underrated screen recording and video editing tools for everyuday use.
But is it good enough for creating a full course? Does it offer enough features for creating engaging videos?
And is it affordable and worth buying?
I’ll answer all of these questions (and more) in this detailed Screencast-O-Matic review.
Let’s dive in.
ScreenPal At A Glance – Product Snapshot
ScreenPal is a screen recording, video editing, and hosting tool that course creators use to produce and share lesson content without juggling multiple apps.
Before diving deeper, let’s take a high-level view of what it offers to edupreneurs.
| What You Need as a Course Creator | How ScreenPal Handles It |
|---|---|
| Built For | Screen recording with basic to mid level editing for educators. |
| Record screen-based tutorials | Yes, fullscreen, partial, or multi-screen with drawing tools |
| Record yourself on camera | Yes, webcam only or side-by-side with your screen |
| Edit footage without a separate tool | Yes, full editor built in with cuts, overlays, transitions, and audio |
| Add captions for accessibility | Yes, auto-generated on Deluxe and above, fully editable |
| Translate content for international students | Yes, 140-plus languages on Max |
| Create quizzes inside your videos | Yes, up to 5 on Free, unlimited on Max |
| Host and share videos securely | Yes, with privacy controls on all plans |
| Control how students experience the video | Basic on Free and Deluxe, full branding and CTAs on Max |
| Sell courses or manage enrollments | No, no payment processing or LMS built in |
| Build a full course portal | No, channels exist but there is no student dashboard or progress tracking |
| Collaborate with a co-creator or team | Only on Team Business plan |
| Integrate with your existing LMS | Only on Team Business via LTI |
| Work offline | Yes, desktop app works without internet |
| Use on mobile | Yes, iOS and Android apps available |
| Get AI to handle post-production tasks | Yes, on Max and above |

Quick Verdict – Is ScreenPal The Right Screen Recorder For You?
Don’t have the time to read the complete review? Then, here’s my quick verdict for you.
If you’re looking for a lightweight, pocket-friendly, and easy-to-use screen recorder with advanced video recording and screenshot-taking abilities, any one of ScreenPal’s paid plans is an excellent choice.
However, if you’re looking for advanced editing options as well, consider other screen recording software.
What Is ScreenPal Used For?

ScreenPal (formerly Screencast-O-Matic) is a screen recording and video editing tool that lets you capture your screen, webcam, or both, then edit and share the footage without switching between multiple apps. It handles the full workflow from recording to hosting in one place.
I’ve tested a lot of screen recording tools over the years, and ScreenPal sits in an interesting middle ground. It’s not trying to compete with Camtasia on editing depth, and it’s not a quick async messaging tool like Loom.
It’s built for solo course creators and educators who want a reliable recording workflow with just enough editing to produce professional-looking results. Its Mac and Windows desktop app works offline, so you’re not stuck waiting for a good connection to get work done.
What’s changed recently is the AI side of the tool.
Its higher plans now include auto-captions, transcriptions, a text-to-speech narrator, a quiz generator that pulls questions directly from your video content, and translation into 100-plus languages. For educators producing content at volume, that removes a significant amount of manual work from the process.
But ScreenPal doesn’t have advanced motion graphics, multi-track audio mixing, or cinematic-level editing. It also has no payment processing built in, so it’s a production and hosting tool, not a course platform.
Here’s a high-level look at what it covers:
- Screen recording, webcam recording, or both simultaneously
- Fullscreen, partial, and multi-screen capture
- Built-in video editor with cuts, overlays, captions, transitions, and audio tools
- AI features including auto-captions, text-to-speech, video generator, and quiz creation
- Screenshot capture with annotation tools
- Storyboard and script builder with teleprompter
- Hosted video channels with privacy controls
- Interactive elements including quizzes, polls, and call-to-action buttons
- Desktop app for Windows and Mac, mobile apps for iOS and Android
ScreenPal Pricing – How Much Does It Cost?
ScreenPal has a free plan to help you get started. It’s fine for a casual user but if you’re a serious course creator, you’ll need to upgrade to one of its paid plans.
You can try the paid plans with a free trial (no credit card required).
Here’s a quick look at the available plans:
- Free – $0/month (forever free)
- Deluxe – $4/month (billed annually)
- Max – $10/month (billed annually)
- Team Business – $8/user/month (min. 3 users, billed annually)
ScreenPal Plan Comparison Table
| Plan | Price | Key Features | Best For |
|---|---|---|---|
| Free | $0/mo | – 15-min recording limit – Up to 10 hosted videos – Basic video editor – Blur webcam background – 5 video quizzes | Beginners testing the platform |
| Deluxe | $4/mo (annual billing) | – Unlimited recording – Unlimited video hosting – Full video editor – Storyboards, scripts & teleprompter – AI speech-to-text captions – AI silence detection – 8M standard stock assets | Solo creators & educators who need a full editing workflow |
| Max | $10/mo (annual billing) | – Everything in Deluxe – AI video generator – AI text-to-speech narration – Auto-captions, chapters & transcriptions – AI translation in 140+ languages – AI quiz generator – Unlimited quizzes & polls – Advanced analytics & video heatmaps – 4K playback – Branded video player & custom domain – 2.8M premium stock assets | Creators who want to scale and save time with AI |
| Team Business | $8/user/mo (min 3 users) | – Everything in Max – Team collaboration & roles – Admin tools & SSO (SAML) – LTI/LMS integrations – Phone support & live onboarding | Businesses, schools & multi-user teams |
All plans include:
- Unlimited video recordings (saved to your device; cloud hosting limited to 10 videos on the Free plan, unlimited from Deluxe up)
- No watermark
- Screenshot capture & editing with annotation tools
- Drawing tools & zoom while recording
- Ad-free video player
- Content organization with folders & channels
- Desktop and mobile support (Windows, Mac, iOS, Android, Chromebook)
ScreenPal’s Strengths and Weaknesses – The Main Pros & Cons
Before I discuss ScreenPal’s features in detail, let me give you a quick summary of its main strengths and weaknesses.
| Pros | Cons |
|---|---|
| Full recording-to-publishing workflow in one tool | Desktop app has historically been reported to crash mid-recording, particularly on longer sessions |
| Storyboard and script builder with teleprompter keeps recording organized | Free plan limits you to 15 minutes per recording and 10 hosted videos |
| AI handles captions, transcriptions, chapters, and quizzes automatically | AI features, analytics, and interactive elements locked behind the Max plan |
| Text-based editing lets you cut footage by editing a transcript | Audio tools are basic, auto-adjust is available but there is no manual EQ, noise reduction, or echo removal |
| Auto-captions and translation into 140-plus languages built in | Caption accuracy can drop with heavy accents or fast speech, manual editing still needed |
| Webcam background removal works without a green screen | No multi-track audio mixing for layering and balancing multiple audio sources |
| Works offline for recording and basic editing | No color correction or grading tools, footage looks exactly as recorded |
| Desktop app runs in the background without interrupting your workflow | No automatic scene switching between screen and webcam during recording, requires manual management |
ScreenPal Features & Benefits

ScreenPal is a robust screencasting solution that comes with all the critical features and capabilities you need to create high-quality videos for your online courses.
Here’s what it offers.
Record Engaging And Interactive HD Videos
ScreenPal’s video recorder allows you to easily capture screen recordings, webcam videos, or both.
It’s a super-fast tool that helps you record specific sections of your screen or capture full-screen recordings in just a few clicks.
It has an easy-to-use drag & drop interface to choose or resize your recording frame and focus on the screen sections you want to record.

You can also add narration to your videos using a mic or enable computer audio to record your system sounds.
This makes it ideal for creating tutorials, product reviews, course lessons, demos, and countless other video types for your online courses.
ScreenPal allows you to record HD 720p, 480p, and custom-sized videos of up to 15 minutes completely free. If you’re creating a module-based course, this duration limit should be sufficient for most of your lessons.
However, you can upgrade for unlimited recording times and tons of other features.
You also get complete control over your webcam frame’s appearance if you’re recording a hybrid video. You can drag the webcam frame to any corner of the recording area and resize it to ensure your audience has the best view of your content.
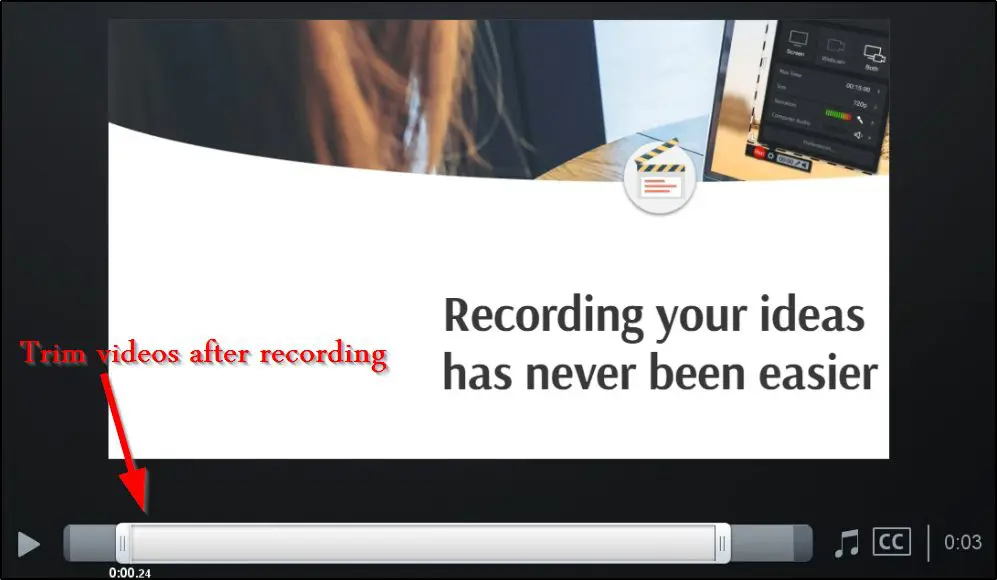
You can trim your videos once the recording is complete to give them a more polished look.
Additionally, you can add captions to your videos from a captions file, use the speech to text feature to automatically generate captions, or start with blank captions and edit on the go. You also have the option to upload a video script before recording your videos to create flawless narrations.
And finally, you can save your videos as GIFs, MP4, AVI, or FLV files to your computer or upload them to YouTube, Google Drive, or your ScreenPal account.
Overall, the ScreenPal video recorder checks all the boxes for online course creators and provides solid features to help you create high-quality video content.
Create Professional Content With Video Editor

ScreenPal offers a free, world-class video editor that lets you turn your raw videos into professional content that makes an impression on the viewers.
It has a modern drag & drop user interface that allows you to easily modify your videos by adding different effects, transitions, design elements, images, etc.
Let’s quickly cover some of the main editing features you get with the ScreenPal video editor.
Cut Sections Of Your Videos
Easily cut and remove frames from anywhere in your videos using ScreenPal’s video editor. This feature is separate from the trimming feature I mentioned earlier.

Insert Pauses
You can insert pauses of any duration between frames by using the insert pause option in the video editor.

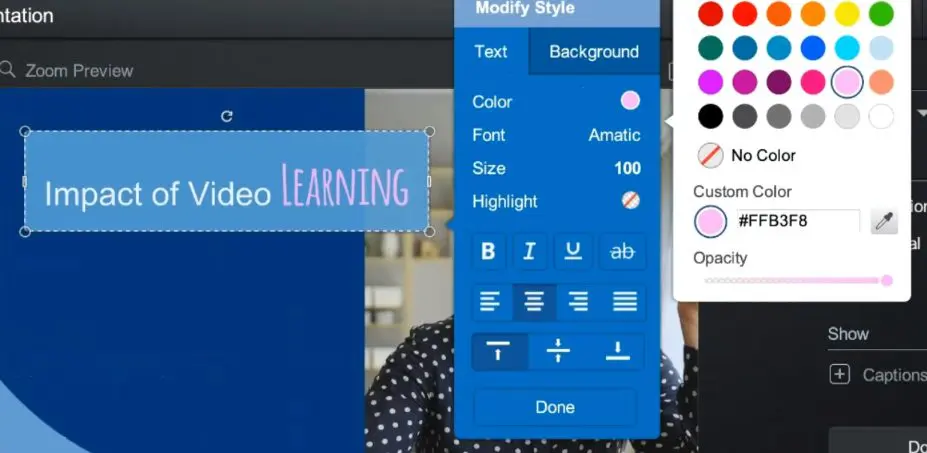
Add Rich Text
Insert rich text annotations anywhere in your videos to give your viewers more context or grab their attention. You can choose the exact time when a dialogue box appears and use exit and entry transitions to make them look more professional.
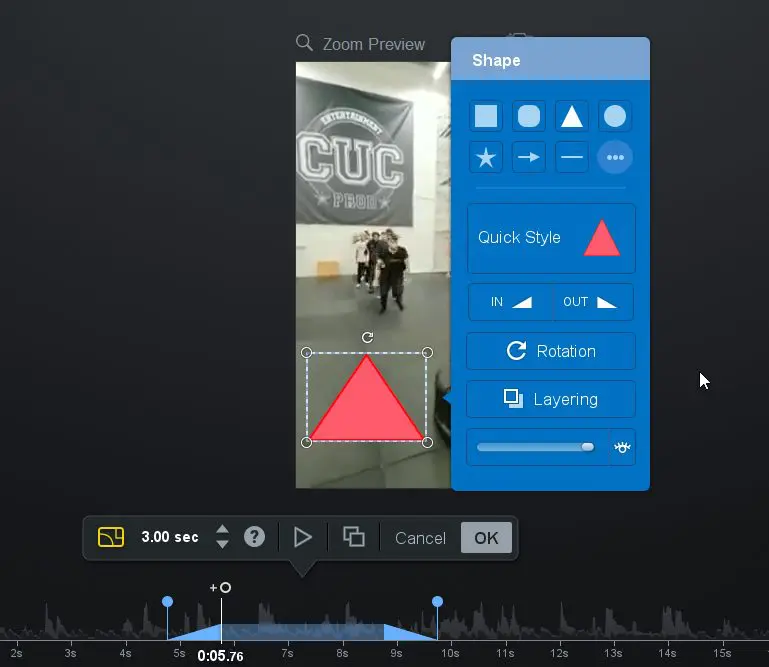
Add Shapes
You can also add different shapes and objects, with transitions, at any specific time in your video.
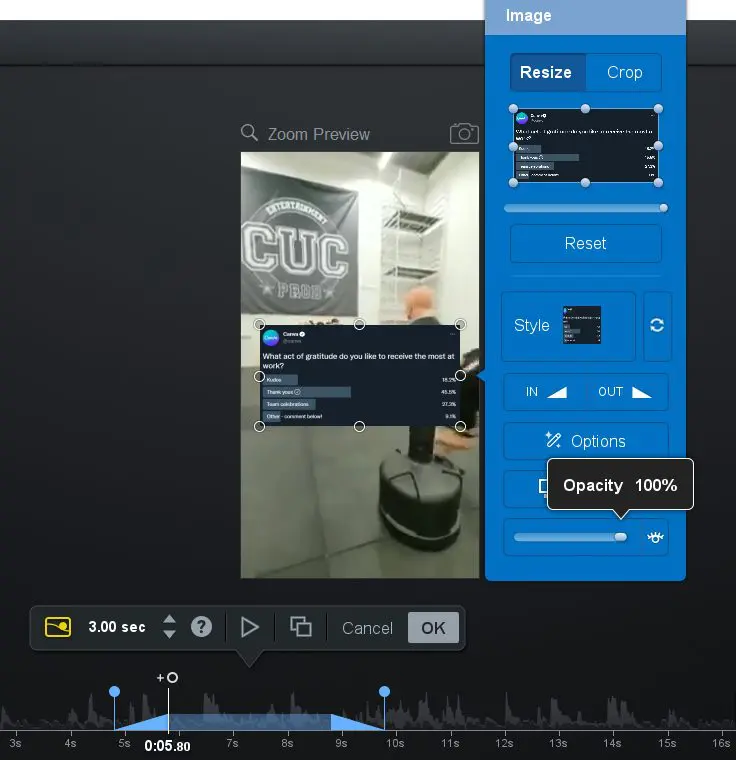
Add Overlay Images And Videos
The video editor also lets you insert overlay images, screenshots, and videos in your content with transitions and several other effects. For example, you can blur the background when playing an overlay video.
Insert Sound Effects
You can make your content more engaging and entertaining by using different sound effects from ScreenPal’s sound library. Similarly, you get access to a wide range of music tracks you can use for different types of content.

Control Your Video Speed And Volume
You can speed up or slow down specific sections of your video or the complete video using ScreenPal’s video editor. Similarly, it allows you to increase the volume for specific video sections.
Add Transitions
You can apply transition effects to the start, end, or specific sections of your videos and animate the different elements of your content.
Blur Video Sections
You can blur specific sections of your video to protect sensitive information or hide something from your viewers.
Insert Narrations And Control Sound Layers
You can add narrations to specific sections of a video and control the volume level between sound layers so that your audience can hear you easily.
Plan Smarter With Stories
Stories is one of ScreenPal’s most powerful features—and it’s perfect for creators who like to plan before hitting record.
It lets you map out your entire video using an interactive storyboard and script builder. Start with a visual outline, add sections, and drag and drop media like video clips, images, or voiceover tracks directly into your story.
Here’s what you can do with Stories:
- Storyboard & Script View – Easily switch between a visual storyboard and script editor to organize your ideas.
- Import Slides & Media – Bring in Google Slides, PowerPoint (as PDFs), images, or audio from your device or cloud storage.
- Auto-Captions From Script – Upload your script and automatically convert it into accurate captions.
- Narration Mapping – Sync audio narration with the right storyboard sections for smoother video creation.
- Edit While You Plan – Make real-time edits to your video content directly from your storyboard or script mode.
Whether you’re creating tutorials, training videos, or course lessons, Stories helps you stay organized and create faster—without juggling a dozen separate tools.
Create Annotated Screenshots

If you’re like me, screenshots are a core part of your content strategy. I use tons of screenshots in my content and tutorials to demonstrate different software features and make my content more engaging.
ScreenPal provides you with a robust screenshot capture tool that is ideal for creating annotated screenshots to make your content more actionable.
When ScreenPal is running in the background, you can use a keyboard shortcut to capture full screen, partial screen, and active window screenshots of your system.
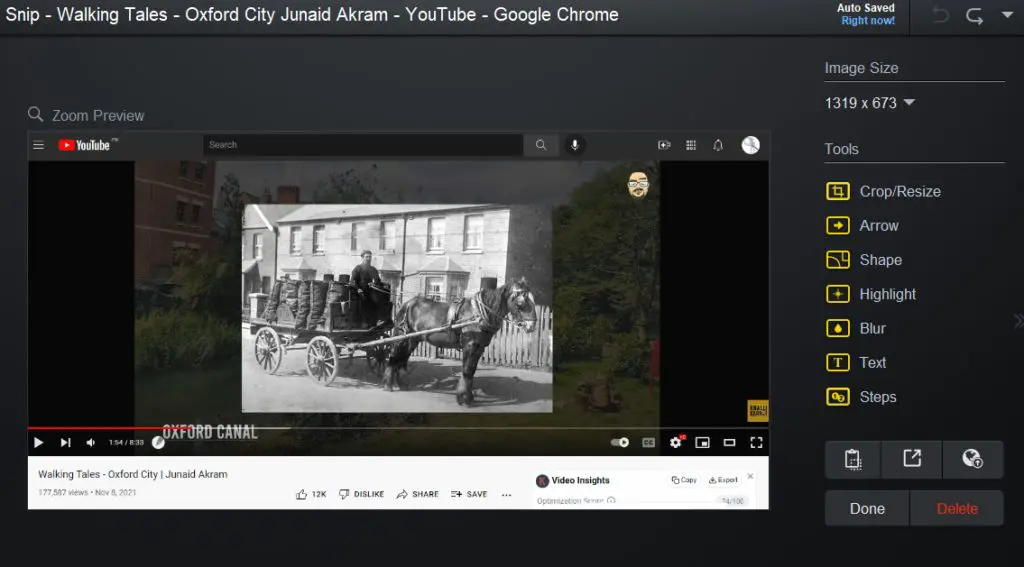
It comes with an image editor that allows you to add different shapes like arrows and boxes, annotations, text callouts, and effects to your images.
I love the “steps” element in ScreenPal that allows you to add numbers to the different steps in an image. This makes it much easier to explain processes and step-by-step guidelines using images.
You can also crop and resize images, highlight specific image sections, or use the obscure effect to hide sensitive information.
Overall, it’s a pretty handy screenshot tool to help you enhance your online course content.
Simplify Editing With ScreenPal’s AI Toolkit
ScreenPal has expanded its AI features significantly, and for course creators producing content at any real volume, this is where the tool earns its price on the Max plan.
Here’s what you get:
Auto Titles and Descriptions – Generates a clear title and summary as soon as your recording ends, so you’re not staring at a blank field every time you upload.
Speech-to-Text Captions – Accurate captions generated automatically, fully editable before you publish. No typing required.
AI Text-to-Speech Narration – Paste your script and choose from a library of realistic voices to narrate your video. Useful if you prefer not to record your own audio, or need a clean voiceover for a section you’ve re-edited.
AI Video Generator – This is the newest addition. Type a text prompt, choose a format, and ScreenPal builds a video from it. You can publish it as-is or take it into the full editor to polish. It won’t replace recorded tutorials, but it’s a fast way to create supplementary content or draft a lesson outline in video form.
Text-Based Video Editing – Instead of scrubbing through a timeline, you edit your video by editing its transcript. Delete a sentence in the transcript and that section disappears from the video. Filler word and silence removal work the same way, which cuts cleanup time considerably.
Silence Removal – Automatically strips long pauses from your footage to keep lessons tight and watchable.
Chapter Detection – AI identifies key moments in your video and adds clickable, time-stamped chapter markers so students can navigate to what they need.
AI Quiz Generator – Pulls quiz questions directly from your video content. A genuine time-saver for educators who build knowledge checks into every lesson.
AI Video Translation – Translates your captions, titles, summaries, and chapters into 140-plus languages. Combined with text-to-speech, you can produce a dubbed version of your video without re-recording anything.
Background Removal – Blur or replace your webcam background without a green screen.
AI Image-to-Text (OCR) – Recognizes text in your screenshots so you can edit, restyle, or remove it directly inside ScreenPal’s image editor. Useful when you’re updating a tutorial and the screenshot text has changed.
Audio Descriptions – Adds descriptive narration for visual content, helping you meet accessibility standards for learners who rely on screen readers.
For educators specifically, the accessibility features deserve attention. Auto-captions, audio descriptions, and multilingual translation mean your content can reach students with hearing impairments and non-English speakers without a separate production workflow. That used to require dedicated tools or outside help. Now it’s handled in the same place you record and edit.
Share Content Channels With Your Audience
“Channels” is among my favorite features in ScreenPal. It’s an easy way to group similar content in your Screencast-O-Matic account to share with your audience.
Here’s how it works.
When you upload videos to your ScreenPal account, you can share them individually with your audience or create public, private, and password-protected channels.
Let’s say you have a series of lessons on a specific topic you want to share with your audience. With Screencast-O-Matic, you can create a dedicated channel for the topic, add relevant videos to it, and create a public URL to let anyone access your content.
If you only want your students or a select group of users to access your content, you can make it password protected or limit access to authorized users only.
Once you add videos to a channel, you can set the playlist by simply dragging videos in the correct order. You can also add multiple channel managers to allow your team members to handle everything for you.
Since ScreenPal offers unlimited cloud storage, you can use its channels to build a complete paid online course for your audience (although it doesn’t have any payment processor.)
How Your Students Experience ScreenPal Videos
Most screen recording tools stop at the export. ScreenPal also controls how your video looks and behaves when a student actually watches it, which matters more than most creators think about upfront.
A few things worth knowing about the hosted video player:
Ad-free on every plan. Your students won’t see ads before or during your videos. That’s not guaranteed on YouTube, which some creators use as a free hosting workaround.
4K playback on Max and Team Business. Free and Deluxe plans cap at 720p. If you’re recording high-detail software walkthroughs or anything where screen text needs to be legible, the quality difference is noticeable.
Custom player controls and branding on Max. You can remove ScreenPal’s default branding and replace it with your own, which keeps the experience consistent if students are watching through your website or course portal.
Call-to-action buttons on Max. You can add clickable buttons directly inside the video player, pointing students to the next lesson, a resource, a signup form, or anything else. It’s a small feature that removes friction at exactly the right moment.
Embed anywhere. All plans support video embedding, so you can drop your hosted videos into a WordPress site, a course platform, or any webpage without the video linking back to ScreenPal’s interface.
If you’re hosting student-facing content, the player experience on Max is meaningfully better than what the free or Deluxe plans offer. The 4K playback and CTA buttons alone justify the step up if you’re publishing regularly.
How To Get Started With ScreenPal
So, how do you start using ScreenPal? Let me break down the process into easy-to-follow steps.
Step 1: Create A Free ScreenPal Account
– Go to the ScreenPal website.
– Click Sign Up
– Create a new account using your email address or sign up using your Google or Apple accounts.
– You’ll get a verification email when you click Continue.
– Go to your email inbox and verify your email.
– Enter your name, choose an account password, and click Create Account.
– Since you’re an online course creator, choose Education as your primary purpose for using ScreenPal.
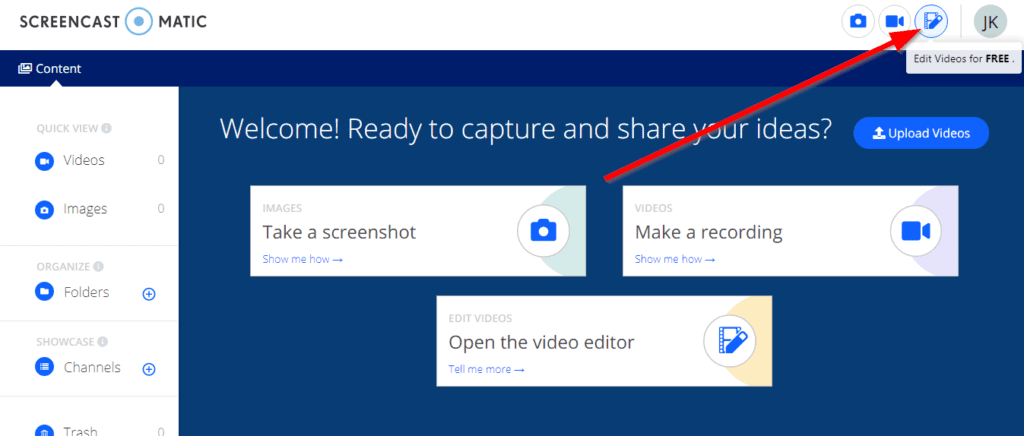
– Once you complete the account creation process, you’ll get access to your ScreenPal dashboard.
Step 2: Install The ScreenPalDesktop Application
Now that you have a ScreenPal account, you need to download and install its desktop application to start using it.
Here’s how to do it.
– In your account dashboard, click Make a Recording.
– This automatically starts the ScreenPal desktop application download.
– Save the setup file to your computer to run it.
– The setup will run and install the application to your system.
– Once the installation is complete, you’ll see the ScreenPal icon in the taskbar.

Step 3: Set Up Keyboard Shortcuts
Before using ScreenPal, it’s important to configure a few keyboard shortcuts. Otherwise, you’ll need to go to your taskbar every time you want to record a video or take a screenshot.
Here’s how to do it.
– Click on the ScreenPal icon in the taskbar to open its menu.
– Click on the Settings icon.
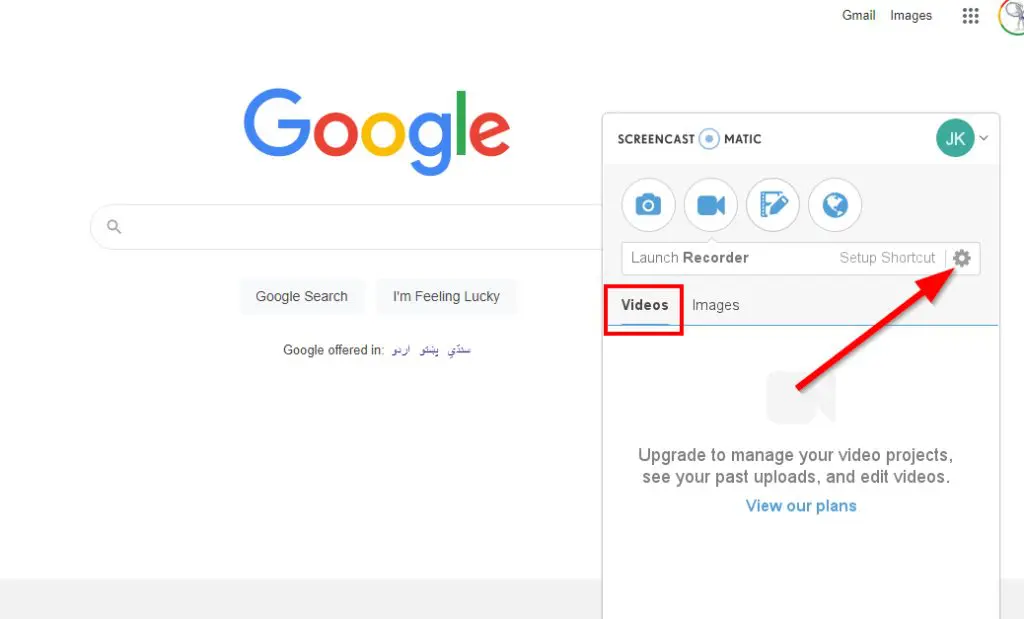
– In the Shortcut tab, enter the shortcuts you want to use for enabling the different features in ScreenPal.
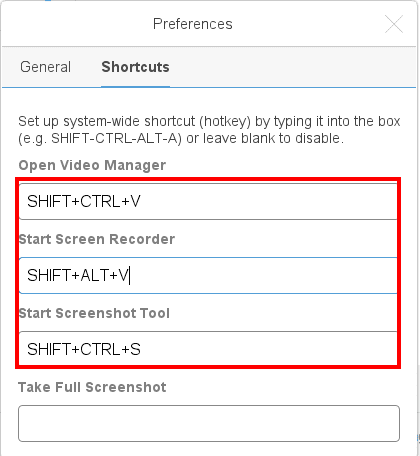
– Leave the shortcut fields blank to disable them.
Step 4: Start Using ScreenPal
Now that you have installed ScreenPal and configured the shortcuts, you can start using it for recording and editing videos and capturing screenshots.
How ScreenPal Works
Let me quickly explain how you can use the main features in ScreenPal.
How To Record A Video With ScreenPal
– Click on the ScreenPal icon in the taskbar.
– Click on the video camera icon to open the recorder.
– Alternately, you can use the keyboard shortcut to open the video recorder.

– Choose the recording area by adjusting the frame or choose full-screen recording from the menu.

– If you want to add narration to your video, enable your mic from the narration menu.
– Choose your screen, webcam, or both as the recording source.
– Now click Rec to start the recording.
– Once the recording is complete, click the stop button.
How To Capture A Screenshot With ScreenPal
– Click the ScreenPal icon in the taskbar and click the camera icon, or use the keyboard shortcut to open it.
– To capture a screenshot, drag and release the pointer to select the relevant area.
– ScreenPa gives you the option to edit your screenshot, save it to your computer, or upload it to your ScreenPal account.
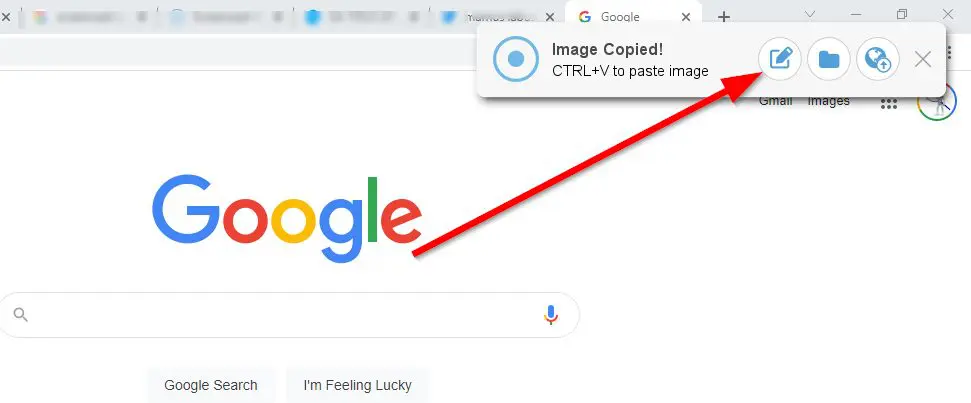
– Clicking the editor icon opens the image editor that allows you to add new shapes and elements, crop images, apply filters, and dozens of other options.
– Once you complete the editing process, save the image to your computer or account.
How To Edit A Video With ScreenPal
– Go to the ScreenPal website, sign-in to your account, and click the video editor icon.
- Click add video to upload a video file from your computer.
- The video editor takes a little time to upload and open the video file.
- Once the file is opened, you can start using various video editing features like trimming, cropping, annotations, CTAs, overlays, text boxes, shapes, audio tracks, etc.
- You can also use the editor to add stock music, sound effects, videos, and images to your videos.
- Once you complete editing, save the video file to your computer or ScreenPal account. You also have the option to publish it directly to YouTube, Google Drive, and several other platforms.
The Verdict | Is ScreenPal The Right Video Recorder And Editor For You?
As you’ve seen in this review, there’s a lot to like about ScreenPal. It provides all the critical features for creating screen recordings and screenshots at an attractive price.
If you’re not into advanced video editing and only require a good enough video recorder, I’d strongly recommend going for one of Screencast-O-Matic’s paid plans.
However, if you’re looking for advanced video editing options as well, consider other options like Camtasia and Screenflow. You can also read our full round up of the best screen recording tools.
Frequently Asked Questions About ScreenPal
1. Can I use ScreenPal without installing anything?
Yes, you can launch the screen recorder directly from your browser without installing the desktop app. However, storyboards, scripts, and some advanced editing features require the desktop version.
2. Does ScreenPal work offline?
Yes, the desktop app on Windows and Mac works offline for recording and basic editing. You need an internet connection to access cloud features, AI tools, and content sharing.
3. Can I record Zoom or Google Meet meetings with ScreenPal?
Yes, you can record any on-screen activity including Zoom, Google Meet, Microsoft Teams, and Webex. Make sure you have permission from other participants before recording any meeting.
4. Does ScreenPal have a free plan and what are its limits?
Yes. The free plan lets you record videos up to 15 minutes, host up to 10 videos in the cloud, create up to 5 quizzes, and use the basic video editor. It does not include AI tools, automated captions, storyboards, or system audio recording.
5. What is the difference between ScreenPal Free, Deluxe, and Max?
Free covers basic recording and editing. Deluxe adds unlimited recording, unlimited hosting, the full editor, storyboards, and AI captions for $4 per month. Max adds the full AI toolkit including the video generator, text-to-speech, translation into 140-plus languages, advanced analytics, and a branded video player for $10 per month.
6. Is ScreenPal good for online course creators?
Yes, particularly for creators who need to record screen-based tutorials, add captions for accessibility, and host video content without building a separate tech stack. It does not handle course sales, student enrollment, or progress tracking, so most course creators pair it with a dedicated course platform.
7. How does ScreenPal handle captions and accessibility?
On Deluxe and above, ScreenPal auto-generates captions using speech-to-text. On Max, it adds audio descriptions, translates captions into 140-plus languages, and generates transcriptions automatically. This makes it one of the more accessible options for educators producing content for diverse or international audiences.
8. Can I add quizzes to my ScreenPal videos?
Yes. You can embed quizzes, polls, and ratings directly inside your videos. The free and Deluxe plans allow up to 5 quizzes. Max and Team Business offer unlimited quizzes with reporting and LMS embedding.
9. What AI features does ScreenPal include?
The Max plan includes auto-captions, transcriptions, an AI video generator, text-to-speech narration, text-based video editing, filler word and silence removal, AI quiz generation, chapter detection, video translation into 140-plus languages, background removal, and OCR for screenshots.
10. Can I upload videos I recorded elsewhere into ScreenPal?
Yes. You can import external video files and use the full editor, overlays, captions, and AI features on them. You are not limited to videos recorded inside ScreenPal.
11. Does ScreenPal integrate with LMS platforms?
LTI integrations for LMS platforms are available on the Team Business plan. Solo plan users can embed videos manually into most course platforms using the standard embed code.
12. How does ScreenPal compare to Camtasia?
Camtasia offers deeper editing capabilities including multi-track timelines, advanced animations, and more precise audio controls. ScreenPal is lighter, more affordable, and faster to work with for straightforward tutorial and lesson content. If your priority is publishing volume over production depth, ScreenPal is the more practical choice.
13. How does ScreenPal compare to Loom?
Loom is built for quick async video messages in a business context. ScreenPal is built for creators who need a full editing and hosting workflow, with AI tools, quizzes, captions, and a branded video player. For course content, ScreenPal covers significantly more ground.
14. Is ScreenPal suitable for creating video courses without a separate course platform?
Partially. You can record, edit, host, and share video content with password-protected channels. However, ScreenPal has no payment processing, student enrollment, or progress tracking. It works well as the video layer of your course, but you would need a separate platform to manage the course itself.
15. What happens to my videos if I cancel my ScreenPal subscription?
If you downgrade to free, your account reverts to the free plan limits. Videos beyond the free hosting limit may become inaccessible. It is worth downloading local copies of your content before cancelling or downgrading any paid plan.

Jeff Cobb, Founder of Learning Revolution
Jeff Cobb is an expert in online education and the business of adult lifelong learning. Over the past 20+ years he has built a thriving career based on that expertise – as an entrepreneur, a consultant, an author, and a speaker. Learning Revolution is a place where Jeff curates tips, insights, and resources to help you build a thriving expertise-based business. Learn more about Jeff Cobb here.
Table of Contents
Related Posts
10 Best Thinkific Examples For Edupreneurs (2026)
How I Get Coaching Clients & Leads From LinkedIn
Buzzsprout Review (2026) | New Pricing for Audio & Video Podcasts