Do you know the number one problem most online course creators face after successfully converting subscribers into trainees?
Their customers don’t complete the course.
Do you know why?
Because most online courses are pre-recorded, monotonous, and unengaging.
So, if you want soaring course completion rates and a highly engaged audience that learns and applies your lessons, consider adding live online classes to your digital products.
Don’t know how to live stream an online class? No problem.
Whether you want to conduct a masterclass, a live cohort course, or a Q&A session, we’ll tell you everything you need to get started.
Let’s dive in.
Why Include Live Classes in Your Online Course
Live Streaming standalone online classes or including them alongside recorded lectures in your online courses offers several benefits.
Live Online Class Benefit #1: More Engaging
Online lectures are inherently more engaging than recorded classes. A comprehensive study of nearly 4 million recorded and live Facebook videos revealed that live sessions drive significantly higher engagement rates.

So, when you conduct live classes or include live lectures in your online courses, students are more likely to consume your content, allowing you to communicate your message more effectively.
Live Online Class Benefit #2: Immediate Feedback
Unlike recorded videos, live content lets instructors and course participants share instant feedback. For example, the instructor can ask course participants if they clearly understand the content. Similarly, learners can ask questions, seek clarity, and provide feedback on the teaching style.
Live Online Class Benefit #3: Increased Authority
Hosting regular live-streaming sessions establishes you as an authority in your niche. When people see that you are not afraid to face your audience live and have the confidence to answer their questions without preparation, they start seeing you as an expert. This has a direct impact on your online course sales, and it makes other influencers and brands notice your presence.
Live Online Class Benefit #4: A Stronger Bond
Research shows that a strong teacher-student relationship enhances learning capacity and improves results. The same applies to professional and corporate training programs.
Live streaming online courses helps you build a close bond with your course participants because you know most of them by name, interact with them during the online classes, and see them progress as you deliver more content.
This ultimately benefits both the course instructors and their program participants.
Live Online Class Benefit #5: Improved Learning
Most live streaming software allows your audience to interact with you directly through live chat, direct messaging, and Q&A sections. So, when students are stuck, don’t clearly understand a concept, or want more clarity, they can immediately seek your help.
Live Online Class Benefit #6: Flexible Teaching
Live streaming online courses gives you the flexibility to change your teaching style depending on your audience. This dynamic nature of online learning means you can change your content delivery style, use better resources, approach the same topic from a different angle, or use any other method necessary to ensure your course participants understand your point.
Live Online Class Benefit #7: Higher Conversion Rates
Live sessions drive higher engagement, improve learning, and strengthen your relationship with your audience. All of this directly impacts the effectiveness of your message and increases your conversion rates.
Why? Because when your audience trusts you as an authority, they’re much likelier to accept your offer, purchase your digital products, and sign up for your online courses.
In short, live streaming should be a pivotal part of your online course marketing strategy.
7 Steps To Live Streaming Online Classes
Now that you know the benefits of live streaming, let’s discuss how to make it a part of your e-learning business.
Step #1: Choose The Right Live Streaming Software
Live streaming software is the first thing you’ll need to broadcast a masterclass or an online course session live.
A live streaming tool connects with your audio and video equipment, allowing your audience to view your content and interact with you.
However, every live streaming platform has different strengths and weaknesses. Some offer basic streaming features for free, while others allow you to create professional-grade broadcasts with excellent audience engagement features. But they’re expensive.
So, what should you look for in a live-streaming tool? Here’s a quick list.
Qualities of The Best Live Streaming Software
When choosing an online video streaming tool, look for the following qualities.
Audience Limits: How many viewers can watch your live stream? Are there any audience size limits? Make sure you choose a platform that can accommodate your audience.
Accessibility: Will your live stream be accessible from different devices, or does your audience need specific software or tools to view your broadcast? This is critical because you’d want your stream to be easily accessible.
Stream Quality: What’s the general streaming quality of a tool? Do viewers experience frequent lag? Does it work well on slow connections by automatically adjusting quality? Test a platform’s performance before choosing it to ensure your audience can view your live content even on sluggish connections.
Engagement Features: What tools does the platform give you to interact with your audience and make your content more engaging? This is crucial to your stream’s retention rates.
Multistreaming: Does the platform allow you to stream your content to multiple platforms simultaneously? This feature is critical for your business if your audience is distributed on different social networks.
Recording: Does the tool record your live streams? Are there any recording size or duration limits? How’s the recording quality? What technology does it use to record the content? Knowing this is crucial because your stream recordings can be used in multiple ways.
Video Enhancements: Does the platform allow you to add overlays, effects, tickers, banners, and other enhancements to make your videos more professional? These features are essential if you want your content to stand out and have a unique identity.
Guest And Participants: Can you invite on-screen guests or participants to your stream? If yes, how many? This is an important feature to consider if you want to conduct live interviews, expert sessions, masterclasses, or other interactive videos.
Here’s a quick list of some of the best live-streaming tools that offer a wide range of features at different price points.
Free Live Streaming Software
Let’s discuss the free options first.
YouTube Live
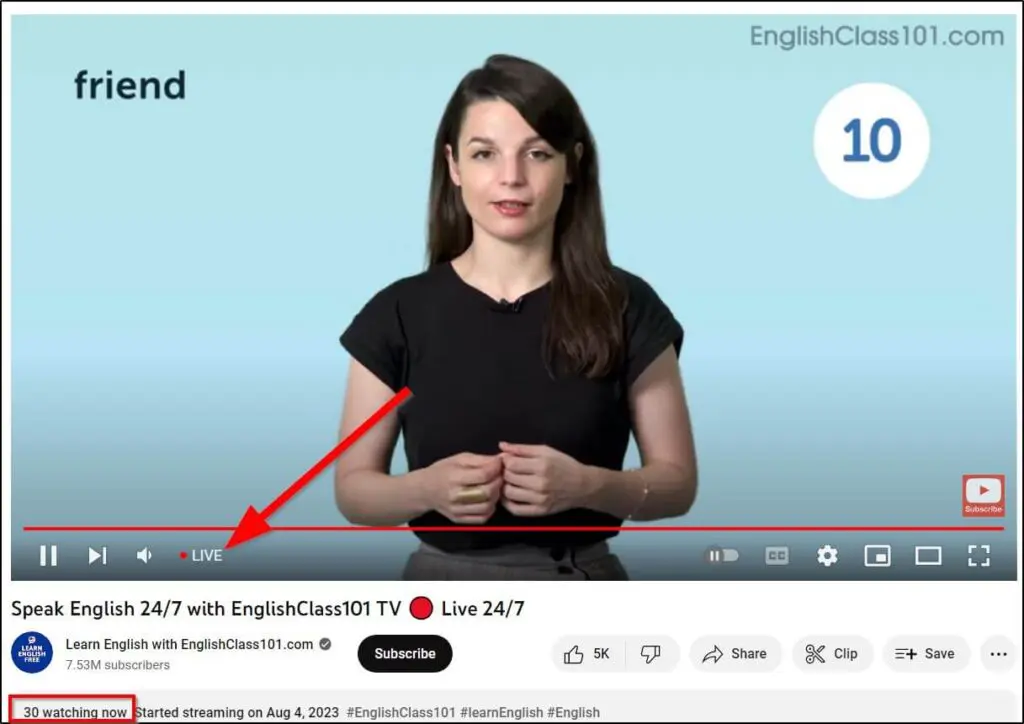
YouTube Live is the easiest way to stream your content publicly or privately. You can go live on YouTube using a smartphone or desktop device and integrate it with numerous marketing apps. However, it lacks many professional broadcasting features.
Still, YouTube Live is an excellent option if you’re new to live streaming.
Read our detailed guide to Live Streaming on YouTube.
Facebook Live
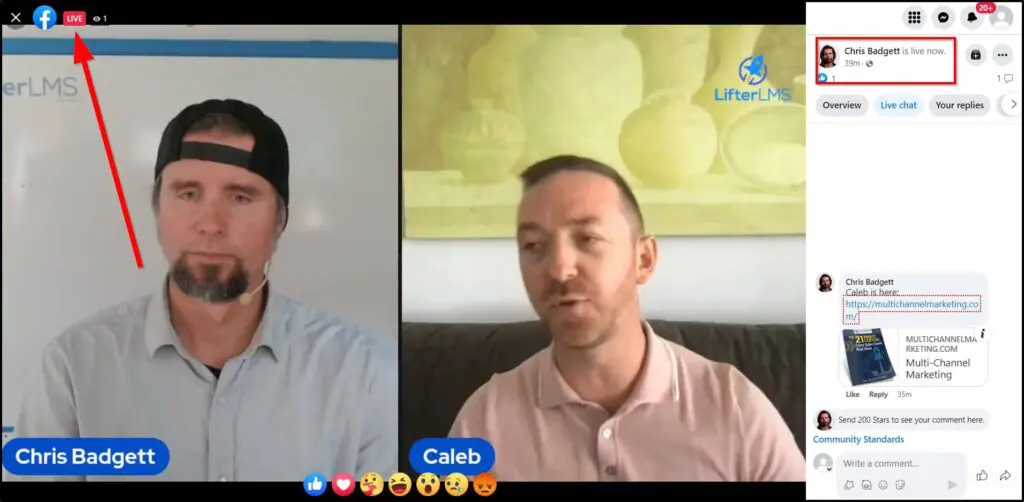
Facebook Live is equally popular and offers the same convenience and features as YouTube. It’s a free platform with no viewership limits. Plus, it makes your stream discoverable to millions of relevant users.
So, alongside YouTube, it’s an excellent option for beginners.
Zoom
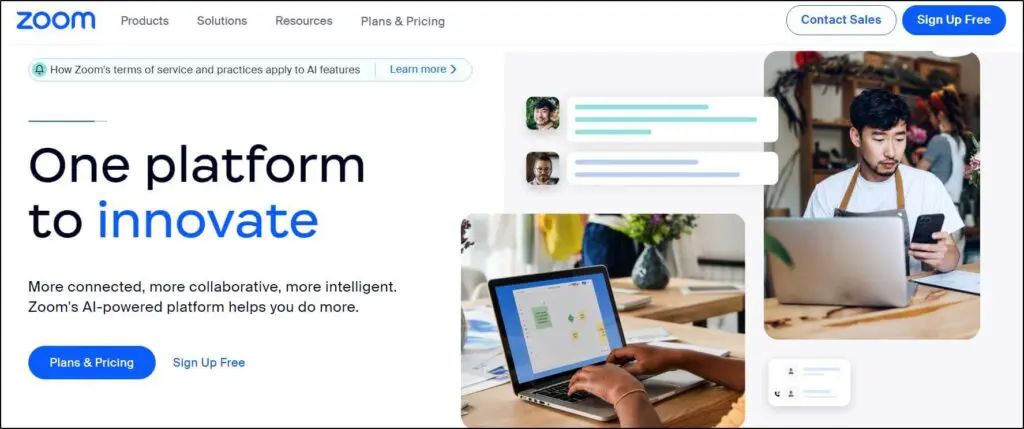
Zoom isn’t technically a live-streaming tool. But it allows you to invite your audience to a private Zoom call where they can watch your class and interact with you via comments and voice messages.
It’s a hugely popular option for beginners because of its ease of use. However, if you’re a professional course seller looking to grow your audience and strengthen your brand, Zoom isn’t the best option because it’s not accessible publicly like Facebook or YouTube, and it limits your exposure.
Premium Online Live Streaming Tools
Here are our favorite paid software solutions for live streaming.
StreamYard

StreamYard is a high-quality live streaming tool that allows you to broadcast your content live to multiple platforms simultaneously. It comes packed with audience engagement and video enhancement features and instantly transforms your content into professional live streams.
Read our detailed StreamYard Review.

Restream
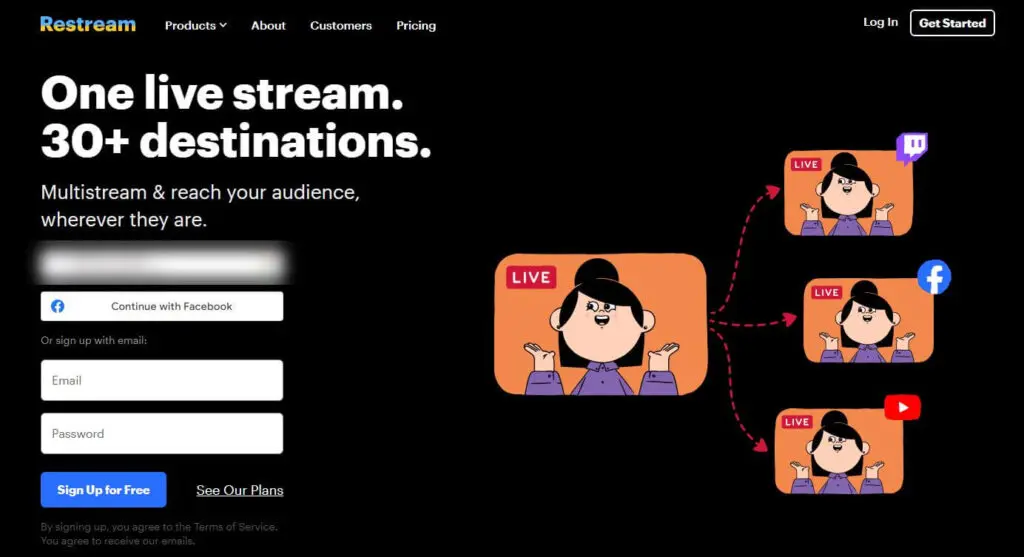
Restream is another hugely popular live streaming tool that supports multistreaming to over 30 social media sites and platforms. It also offers diverse audience engagement features, visual effects, and integrations to help you create world-class live streams.
With the platform’s latest update comes lightning-fast performance, seamless functionality, and more engaging live-streams for your audience. You get features such as instant scene transitions and enhanced production tools for professional-quality streaming.
Read our detailed Restream Studio 2.0 Review.

Be.Live

Be.Live is a multi-streaming platform ideal for beginners because of its user-friendly features and pricing. It lets you stream branded videos on multiple platforms, invite on-screen guests, and share files and presentations with your audience.
Read our detailed Be.Live Review.

Step #2: Integrate Your Online Course Platform
Depending on how you plan to use live streaming in your business, this is an optional step.
If you want to hold standalone live streams to grow your audience or generate leads for your online courses, you don’t need to follow this step; an online streaming tool should be enough.
But if you’re already selling online courses, coaching programs, cohort courses, memberships, or any other digital products and want to include live streams as a part of your offer, you should invest in an online course platform.
Why? Because an online course platform allows you to create a professional classroom environment and deliver your course content in a structured way. In addition, it gives you student engagement features like graded assignments, quizzes, and classroom exercises.
So, let’s say you already have an online course with 5 modules and 30 recorded lessons. But now, you want to include live sessions in two of your modules to make your product more valuable.
In this case, you’ll simply integrate your live streaming platform with your online course software. In easier words, you can embed a live stream player in one of your course lessons. This way, your course participants can access your live stream in the same course environment.
There are many online course platforms for different kinds of learning goals. But we think the following are the best options:
- Thinkific – Best Overall Online Learning Platform (Read the full review)
- Kajabi – Best eLearning And Marketing Platform (Read the full review)
- Teachable – Best eLearning Platform For Beginners (Read the full review)
For example, here’s how you can embed a YouTube live stream in your Thinkific lesson.

The live stream would appear in a regular YouTube video player accessible only to your registered course participants.
Some online course and membership platforms like Circle.so offer native live-streaming features. So, if you don’t need multi-streaming and want to deliver live lectures for your course members only, Circle can replace your live-streaming software.
Step #3: Get Your Live Streaming Equipment
You must invest in the right live-streaming equipment to deliver high-quality live classes.
So, what equipment do you exactly need to broadcast live sessions? Here’s a quick list.
Video Camera
You can go live using your smartphone camera or laptop webcam. But if you want your picture quality to stand out, invest in a professional streaming camera.
We recommend the following cameras for live streaming.
Logitech Brio: An ultra HD 4K webcam with an omnidirectional mic, ideal for professional live streaming.
Sony PXW-Z90: A high-end 4K HD camcorder with autofocus and 129 fps recording. It is built for serious streamers looking to make an immediate impression on their audience.
Mic
If you want your viewers to stay engaged and consume your content, your live stream’s audio quality should be top-notch.
So, instead of using your smartphone or camera’s mic, invest in a professional streaming mic.
Here are a couple of good options.
Blue Yeti USB: One of the most popular professional mics for content creators because of its affordability and excellent sound quality.
Sennheiser MKE 600: A high-end professional mic with outstanding noise cancellation and recording features.
Lighting
You can’t rely on daylight alone when streaming live video content. Instead, consider investing in one of the following lighting solutions.
Neewer Ring Light Kit: An affordable, beginner-friendly, and convenient ring-light setup.
Elgato Key Lights: Professional lighting equipment powered with Wi-Fi connectivity and auto-dimming features to illuminate your workspace.
Apart from using this critical equipment, ensure your room is soundproof or has some cushioning to minimize outside noise.
Read our detailed live-streaming equipment guide for more recommendations and details.
Step #4: Choose a Content Delivery Style
Now that everything is ready, it’s time to finalize your content structure and delivery method.
If you’re doing a standalone live broadcast, it can be a Q&A session, an interview, or an informational video where you share your experience and tips with your viewers.
But if your stream is a part of your online course curriculum, it needs to align with the other lessons in your module. So, ensure your course participants can easily connect the dots between your pre-recorded and live course content.
In addition, you must choose your content delivery format because it impacts your software and equipment choices. For example, if you want to share your desktop view, you’ll need to use a streaming tool with screencast features.
Similarly, if you want to host multiple on-screen participants for a discussion, make sure your software and equipment can host such content.
Step #5: Secure Your Internet Connection
Slow or inconsistent internet speed can be one of the biggest turn-offs in a live stream. If your video keeps buffering or your video quality downgrades because of a slow connection, all your investment in software and equipment is wasted.
So, before going live, make sure you have a reliable, consistent, and high-speed internet connection. Ideally, use a cable internet connection to avoid signal issues. But if you’re using a Wi-Fi connection, stay close to the router.
Stop all internet-draining apps and software on your smartphone and computer, giving your stream the best resources possible.
Finally, run a test broadcast before inviting anyone to your live stream to ensure it’s working smoothly. View your broadcast on multiple devices using different internet connections by asking team members or friends to join your test stream.
Step #6: Invite Participants To Your Live Online Class
Finally, you’re ready to host your live online class. But to ensure your audience shows up on time, send them your stream’s invitation link 2-3 days before the event.
This allows you time to send them a reminder if they don’t sign up. Plus, you can set up automatic reminders that go out a few hours before your broadcast.
Step #7: Start Your Live Online Class
The invitations are out, and it’s time to go live.
Ideally, start the session 10-15 minutes early to check all the settings and test your stream on multiple devices.
As you start streaming, get your audience’s feedback on the broadcast quality to ensure it works fine.
How to Live Stream a Masterclass or Online Course
Let’s see a quick step-by-step example of how to live stream an online course or masterclass using two different platforms.
Live Streaming with YouTube
Step 1: Sign into your YouTube account.
Step 2: Click the + icon on the top of your screen

Step 4: Click Go Live to open YouTube Studio

Step 5: Click the webcam icon to stream directly from your camera.
Step 6: Give your stream a title and description and choose visibility options.
Step 7: Go live.
That’s the easiest way to stream online. However, to broadcast branded and professional content with enhanced visual effects, use a streaming tool like StreamYard or Restream with YouTube.
Live Streaming with StreamYard
Step #1: Sign up for a StreamYard account.
Step #2: Sign in to your StreamYard account.
Step #3: Click Create
Step #4: Choose Live
Step 5: Connect your YouTube channel with StreamYard by granting the necessary permissions.
Step 6: Give your stream a title and description.
Step 7: Go Live.
This stream will go live on your YouTube channel (plus any other platforms you add to your StreamYard account).
Read our detailed guide to using StreamYard with YouTube for more details.
6 Tips For Successfully Hosting Live Online Courses and Masterclasses
You’re ready to start streaming your online courses. But do you know how to make them engaging and successful? Here are a few quick tips. (For more, check out our free course Presenting for Impact.)
1. Design Your Workspace and Background
Create a dedicated workspace for live broadcasts that reflects your brand’s colors and theme and improves visibility.
This is important because a busy background can distract viewers from your content and make you look unprofessional.
This Pinterest page has some awesome workspace background ideas.
2. Create A Professional Branded Stream
Whether you’re streaming with YouTube, StreamYard, or any other platform, make sure your video production quality is top-drawer.
YouTube allows you to use your brand’s logo in your videos. But that’s about it.
To display name plates, tickers, effects, and other visual enhancements, you’ll need to use one of the professional live-streaming platforms we’ve discussed.
3. Use a Loose Script for Your Presentation
A script, even a loose one, is vital for creating a professional live stream. Remember, you can’t edit your live stream and must deliver content fluently.
So, it’s always a good idea to list all the key topics you want to cover along with key statistics, examples, or any other important information you want to share in your broadcast.
Read our scripting guide for more details on writing different types of scripts for online streaming.
4. Engage Participants with Live Activities
With so many distractions, people taking live online classes can easily lose interest if your content isn’t engaging enough.
So, if your live session is longer than 15-20 minutes, include different content formats to keep your viewers engaged.
For example, you can switch between your camera and desktop, invite on-screen participants, invite questions, or run a competition.
This is where using an online course platform with your live streaming tool comes in handy. Software like Thinkific, Teachable, or Kajabi have different engagement and assessment features that allow you to retain your audience’s attention and keep your content interesting.
5. Give Session Handouts and Presentation Files
Providing your audience with PDF handouts before your live session and presentation files afterward is a great way to enhance their learning and encourage them to take notes.
You can share these handouts, notes, and presentations in PDF or PPT files from your live streaming tool or online course platform.
6. Offer Live Class Recordings
If you host a live session as a part of your online course, offering session recordings to your audience allows them to review any parts they couldn’t understand or want to revisit.
However, if your live stream is for lead generation, keep the recording to use it later in your sales funnel.
Are You Ready To Live Stream Your Next Online Class?
Live streaming online classes as part of your eLearning products or as standalone sessions is a guaranteed way to build your authority and enhance your audience’s learning experience.
However, to pull off successful live streams, you should prepare and plan well and use the software platforms offering the features you need to produce high-quality content.

Jeff Cobb, Founder of Learning Revolution
Jeff Cobb is an expert in online education and the business of adult lifelong learning. Over the past 20+ years he has built a thriving career based on that expertise – as an entrepreneur, a consultant, an author, and a speaker. Learning Revolution is a place where Jeff curates tips, insights, and resources to help you build a thriving expertise-based business. Learn more about Jeff Cobb here.
Table of Contents
Related Posts
8 Best Text To Speech AI Voice Generators for E-learning (2026)
How To Become A Consultant | A Practical Step by Step Guide (2026)
My 3M Model: How I Decide If a Course Idea Is Worth Building