
TL;DR – What Is ScreenPal and Should You Use It?
ScreenPal (formerly Screencast-O-Matic) is an all-in-one screen recording, video editing, and content sharing platform designed for course creators, educators, and business teams. You can record your screen, webcam, or both, trim and edit videos, add overlays, transitions, captions, music, quizzes, and even AI-powered enhancements—all in one place.
✅ Core Features
– Screen + webcam recording with drawing tools
– Full-featured video editor (text, shapes, overlays, blur, transitions)
– AI tools (speech-to-text captions, text-to-speech narration, auto titles)
– Interactive video storyboards & quizzes
– Screenshot capture with annotation tools
– Channels and folders for organizing & sharing content
– Unlimited cloud hosting
💰 Pricing
Free: $0/month
Deluxe: $4/month (billed annually)
Max: $10/month (billed annually)
Team Business: $8/user/month (min. 3 users)
👍 Best For:
– Solo course creators, teachers, and marketers who need a fast, reliable way to produce and share polished videos
– Teams that want to collaborate on video projects and track performance with built-in analytics
👎 Not Ideal For:
– Creators who need advanced motion graphics or high-end cinematic effects
– Businesses looking for built-in payment processing or full LMS capabilities
Try ScreenPal For Free
ScreenPal, formerly Screencast-O-Matic, might not be the first name that comes to mind when you think of the best screen recorders and video editors.
However, once you start using it, you realize it offers impressive video recording, editing, screencasting, and screen capturing features for online course creators – all in a web-based interface.
But is it good enough for creating your course content?
Does it offer enough features for creating engaging videos?
Is it user-friendly?
And is it affordable and worth buying?
I’ll answer all of these questions (and more) in this detailed Screencast-O-Matic review.
Let’s dive in.
Quick Verdict – Is ScreenPal The Right Screen Recorder For You?
Don’t have the time to read the complete review? Then, here’s my quick verdict for you.
If you’re looking for a lightweight, pocket-friendly, and easy-to-use screen recorder with advanced video recording and screenshot-taking abilities, any one of ScreenPal’s paid plans is an excellent choice.
However, if you’re looking for advanced editing options as well, consider other screen recording software.

What Is ScreenPal Used For?

ScreenPal (formerly Screencast-O-Matic) is a leading screen recorder and video editor that allows you to easily create HD screencasts, webcam videos, and screenshots.
It is popular among online course creators and marketers because of its ease of use and robust video recording and editing features.
ScreenPal comes with advanced video recording capabilities that help you create engaging content using annotations, in-video CTAs, narrations, audio mixing, and several other valuable features.
It’s a lightweight tool that works perfectly on Windows, Mac, Android, and iOS. In addition, it integrates with dozens of marketing, productivity, and communication tools such as Zoom, Slack, Skype, Google Slides, Sheets, Trello, etc.
ScreenPalworks as an offline application integrated with your cloud account. As a result, you can seamlessly save and backup your content in your ScreenPal account and access it from any device.
If you don’t have an active internet connection, you can use the offline application to create videos and screenshots and upload the content when you’re back online.
Before discussing the tool in more detail, let’s take a bird’s eye view of its main features and options.
– Video recording with three modes — screencasts, webcam recording, and hybrid (webcam+screencasts)
– Fullscreen, partial, and multi-screen recording
– Screenshots with annotations and image enhancements.
– In-video calls to action (CTAs)
– Zoom and highlights for videos
– System sound, narration via mic, or both for the audio source.
– An extensive stock library of high-quality images, sound effects, and music tracks.
– A drag & drop video and audio editor.
– Transitions and animations.
– Video templates
– Public, private, and password-protected content channels.
– Dozens of third-party integrations.
In short, ScreenPal is a complete video recording and editing solution for online course creators looking to create interactive video courses.
Let’s now discuss some of its core features in more detail.
ScreenPal Features & Benefits

ScreenPal is a robust screencasting solution that comes with all the critical features and capabilities you need to create high-quality videos for your online courses.
Here’s what it offers.
Record Engaging And Interactive HD Videos
ScreenPal’s video recorder allows you to easily capture screen recordings, webcam videos, or both.
It’s a super-fast tool that helps you record specific sections of your screen or capture full-screen recordings in just a few clicks.
It has an easy-to-use drag & drop interface to choose or resize your recording frame and focus on the screen sections you want to record.

You can also add narration to your videos using a mic or enable computer audio to record your system sounds.
This makes it ideal for creating tutorials, product reviews, course lessons, demos, and countless other video types for your online courses.
ScreenPal allows you to record HD 720p, 480p, and custom-sized videos of up to 15 minutes completely free. If you’re creating a module-based course, this duration limit should be sufficient for most of your lessons.
However, you can upgrade for unlimited recording times and tons of other features.
You also get complete control over your webcam frame’s appearance if you’re recording a hybrid video. You can drag the webcam frame to any corner of the recording area and resize it to ensure your audience has the best view of your content.
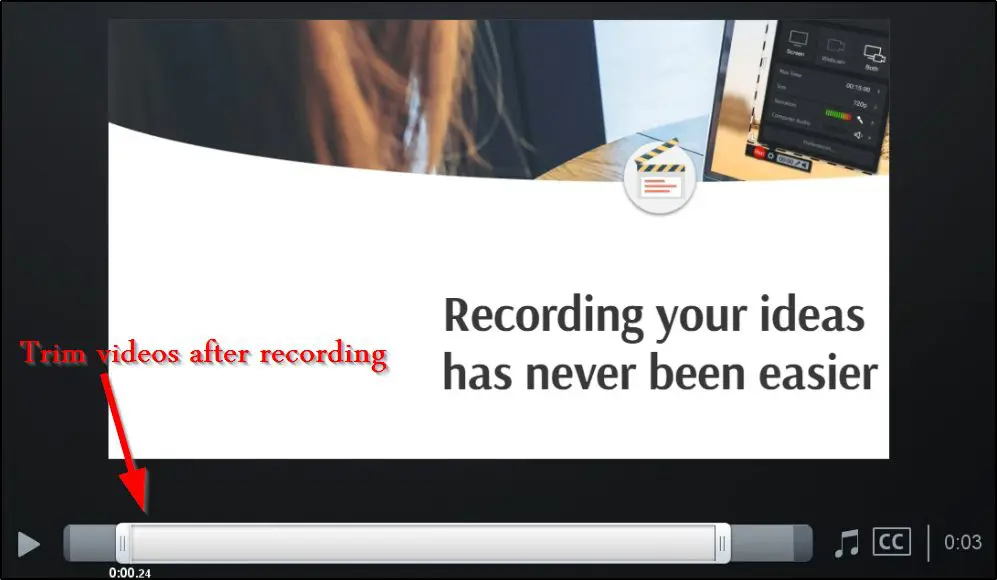
You can trim your videos once the recording is complete to give them a more polished look.
Additionally, you can add captions to your videos from a captions file, use the speech to text feature to automatically generate captions, or start with blank captions and edit on the go. You also have the option to upload a video script before recording your videos to create flawless narrations.
And finally, you can save your videos as GIFs, MP4, AVI, or FLV files to your computer or upload them to YouTube, Google Drive, or your ScreenPal account.
Overall, the ScreenPal video recorder checks all the boxes for online course creators and provides solid features to help you create high-quality video content.
Create Professional Content With Video Editor

ScreenPal offers a free, world-class video editor that lets you turn your raw videos into professional content that makes an impression on the viewers.
It has a modern drag & drop user interface that allows you to easily modify your videos by adding different effects, transitions, design elements, images, etc.
Let’s quickly cover some of the main editing features you get with the ScreenPal video editor.
Cut Sections Of Your Videos
Easily cut and remove frames from anywhere in your videos using ScreenPal’s video editor. This feature is separate from the trimming feature I mentioned earlier.

Insert Pauses
You can insert pauses of any duration between frames by using the insert pause option in the video editor.

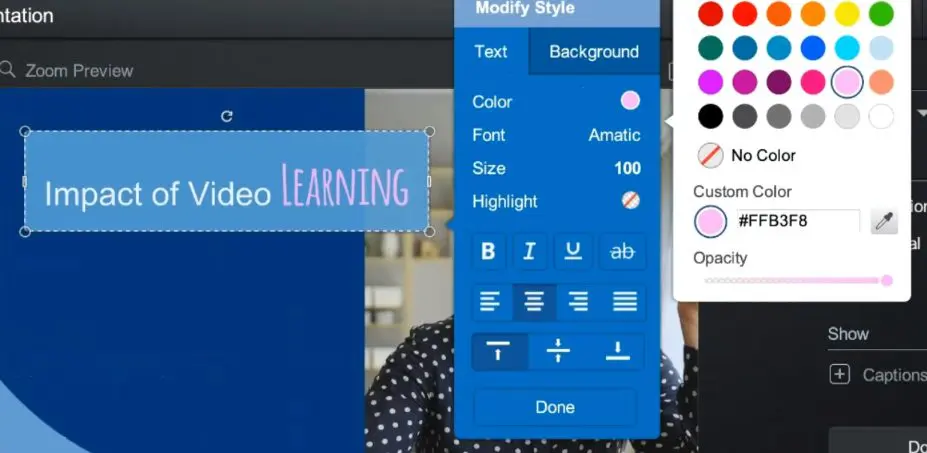
Add Rich Text
Insert rich text annotations anywhere in your videos to give your viewers more context or grab their attention. You can choose the exact time when a dialogue box appears and use exit and entry transitions to make them look more professional.
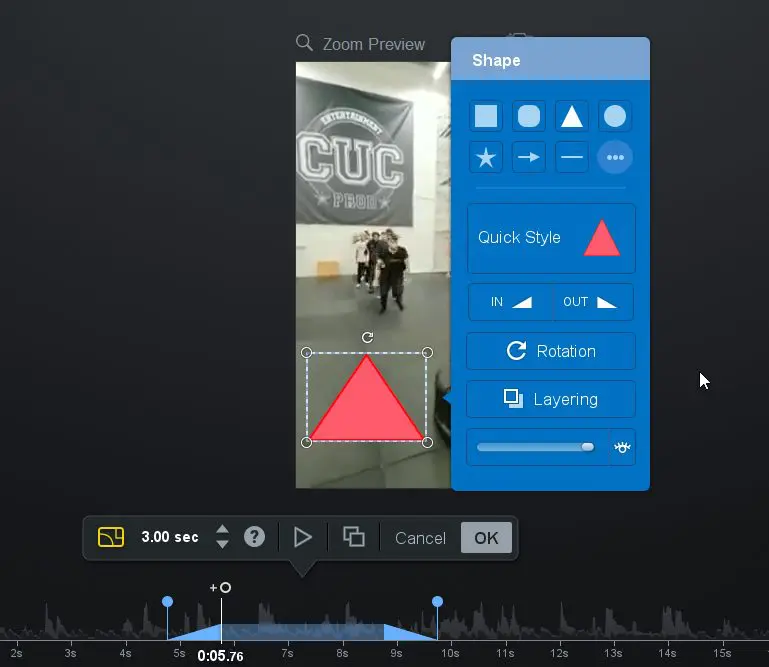
Add Shapes
You can also add different shapes and objects, with transitions, at any specific time in your video.
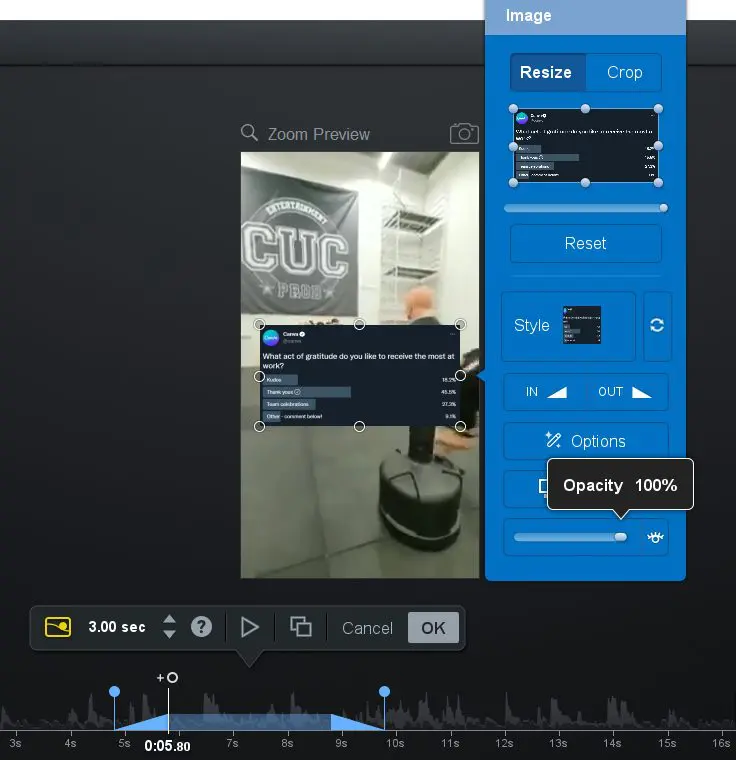
Add Overlay Images And Videos
The video editor also lets you insert overlay images, screenshots, and videos in your content with transitions and several other effects. For example, you can blur the background when playing an overlay video.
Insert Sound Effects
You can make your content more engaging and entertaining by using different sound effects from ScreenPal’s sound library. Similarly, you get access to a wide range of music tracks you can use for different types of content.

Control Your Video Speed And Volume
You can speed up or slow down specific sections of your video or the complete video using ScreenPal’s video editor. Similarly, it allows you to increase the volume for specific video sections.
Add Transitions
You can apply transition effects to the start, end, or specific sections of your videos and animate the different elements of your content.
Blur Video Sections
You can blur specific sections of your video to protect sensitive information or hide something from your viewers.
Insert Narrations And Control Sound Layers
You can add narrations to specific sections of a video and control the volume level between sound layers so that your audience can hear you easily.
Simplify Editing With ScreenPal’s AI Toolkit
ScreenPal has several AI video editing and enhancement features to simplify content creation and save you hours of manual work. Here’s what you get:
- Auto Titles & Descriptions – Instantly generate clear, SEO-friendly titles and summaries as soon as your recording ends.
- Speech-to-Text Captions – Get fast, accurate captions without typing a word.
- AI Voiceover – Paste your script and choose a realistic AI voice to narrate your video.
- Silence Removal – Automatically remove long pauses from your video to keep it tight and focused.
- Chapter Detection – AI finds key points in your content and adds clickable chapter markers.
- Multi-language Subtitles – Translate your video captions into 100+ languages with one click.
- Background Cleanup – Blur or replace your messy background—no green screen needed.
- AI Quiz Generator – Turn your video into an interactive learning experience with smart quiz questions.
Plan Smarter With Stories
Stories is one of ScreenPal’s most powerful features—and it’s perfect for creators who like to plan before hitting record.
It lets you map out your entire video using an interactive storyboard and script builder. Start with a visual outline, add sections, and drag and drop media like video clips, images, or voiceover tracks directly into your story.
Here’s what you can do with Stories:
- Storyboard & Script View – Easily switch between a visual storyboard and script editor to organize your ideas.
- Import Slides & Media – Bring in Google Slides, PowerPoint (as PDFs), images, or audio from your device or cloud storage.
- Auto-Captions From Script – Upload your script and automatically convert it into accurate captions.
- Narration Mapping – Sync audio narration with the right storyboard sections for smoother video creation.
- Edit While You Plan – Make real-time edits to your video content directly from your storyboard or script mode.
Whether you’re creating tutorials, training videos, or course lessons, Stories helps you stay organized and create faster—without juggling a dozen separate tools.
Create Annotated Screenshots

If you’re like me, screenshots are a core part of your content strategy. I use tons of screenshots in my content and tutorials to demonstrate different software features and make my content more engaging.
ScreenPal provides you with a robust screenshot capture tool that is ideal for creating annotated screenshots to make your content more actionable.
When ScreenPal is running in the background, you can use a keyboard shortcut to capture full screen, partial screen, and active window screenshots of your system.
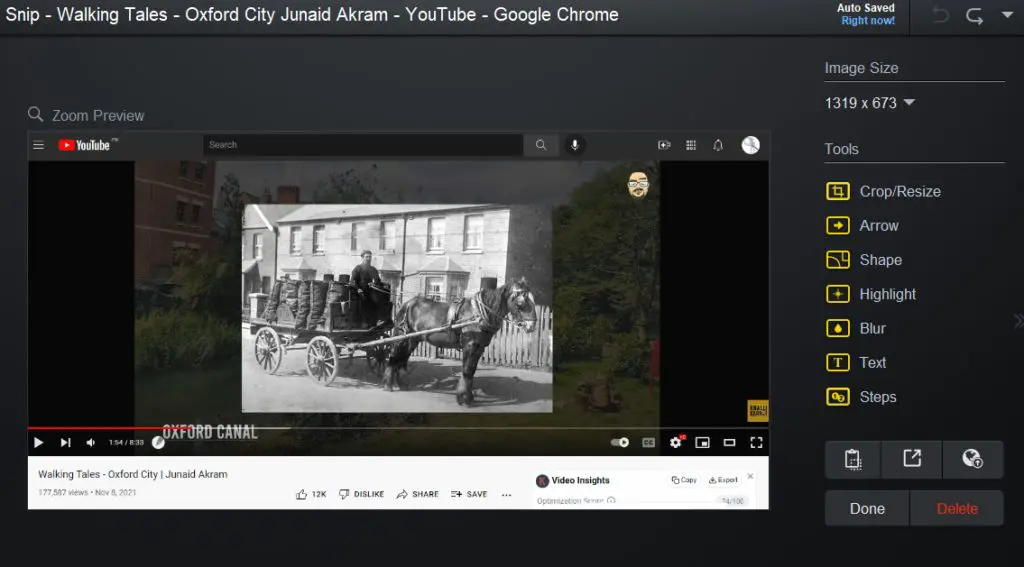
It comes with an image editor that allows you to add different shapes like arrows and boxes, annotations, text callouts, and effects to your images.
I love the “steps” element in ScreenPal that allows you to add numbers to the different steps in an image. This makes it much easier to explain processes and step-by-step guidelines using images.
You can also crop and resize images, highlight specific image sections, or use the obscure effect to hide sensitive information.
Overall, it’s a pretty handy screenshot tool to help you enhance your online course content.
Share Content Channels With Your Audience
“Channels” is among my favorite features in ScreenPal. It’s an easy way to group similar content in your Screencast-O-Matic account to share with your audience.
Here’s how it works.
When you upload videos to your ScreenPal account, you can share them individually with your audience or create public, private, and password-protected channels.
Let’s say you have a series of lessons on a specific topic you want to share with your audience. With Screencast-O-Matic, you can create a dedicated channel for the topic, add relevant videos to it, and create a public URL to let anyone access your content.
If you only want your students or a select group of users to access your content, you can make it password protected or limit access to authorized users only.
Once you add videos to a channel, you can set the playlist by simply dragging videos in the correct order. You can also add multiple channel managers to allow your team members to handle everything for you.
Since ScreenPal offers unlimited cloud storage, you can use its channels to build a complete paid online course for your audience (although it doesn’t have any payment processor.)
Organize Content With Folders
Channels allow you to organize your content for your audience. For internal management and organization, you can use the folders in ScreenPal
Folders allow you to organize your content by topics, dates, or any other way you want. They work just like regular Windows folders and come in really handy when you have hundreds of recordings.
You can also create unlimited sub-folders and move files across different folders using ScreenPal’s drag & drop interface.
Additionally, you get in-folder search options to help you find any files or videos you want.
ScreenPal Pricing – Simple Plans for Every Creator
ScreenPal offers a generous free plan to help you get started, plus affordable upgrades packed with features. Whether you’re a solo course creator, educator, or a team managing dozens of videos, there’s a plan that fits your needs and budget.
You can try the paid plans with a free trial—no credit card required.
Here’s a quick look at the available plans:
- Free – $0/month (forever free)
- Deluxe – $4/month (billed annually)
- Max – $10/month (billed annually)
- Team Business – $8/user/month (min. 3 users, billed annually)
ScreenPal Plan Comparison Table
| Plan | Price | Key Features | Best For |
|---|---|---|---|
| Free | $0/mo | – 15-min recordings – Basic video editor – Blur background – Unlimited hosting – 5 quizzes | Beginners testing the platform |
| Deluxe | $4/mo (annual billing) | – Unlimited recording – Full video editor – Audio editing – Storyboards – AI captions | Solo creators & educators with basic needs |
| Max | $10/mo (annual billing) | – Everything in Deluxe – AI tools (text-to-speech, captions, transcriptions) – Unlimited quizzes – Advanced analytics – 8M+ stock assets | Creators who want to scale and save time with AI |
| Team Business | $8/user/mo (min 3 users) | – Everything in Max – Team collaboration – Admin tools – SSO – LMS integrations | Businesses, schools & multi-user teams |
✅ All plans include:
- Share anywhere with privacy controls
- Unlimited video hosting
- Screenshot capture & editing
- Content organization with folders & channels
- Drawing tools & annotations
- Desktop and mobile support
How To Get Started With ScreenPal
So, how do you start using ScreenPal? Let me break down the process into easy-to-follow steps.
Step 1: Create A Free ScreenPal Account
– Go to the ScreenPal website.
– Click Sign Up
– Create a new account using your email address or sign up using your Google or Apple accounts.
– You’ll get a verification email when you click Continue.
– Go to your email inbox and verify your email.
– Enter your name, choose an account password, and click Create Account.
– Since you’re an online course creator, choose Education as your primary purpose for using ScreenPal.
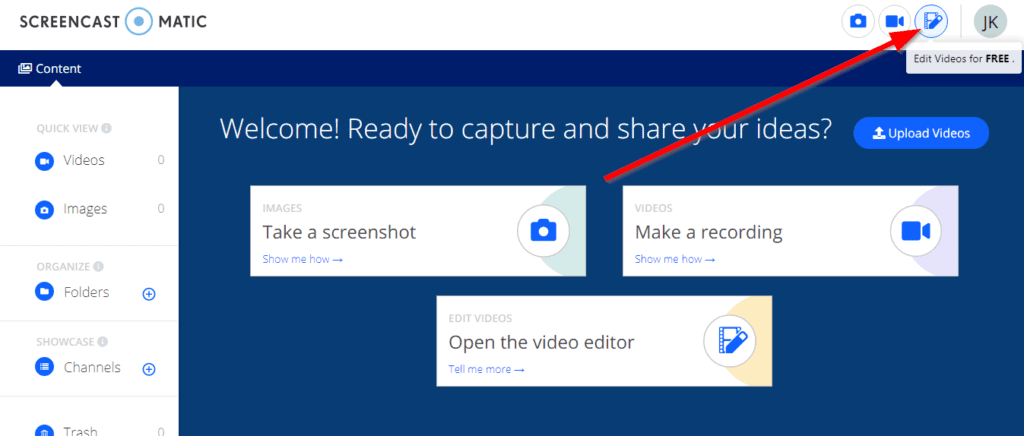
– Once you complete the account creation process, you’ll get access to your ScreenPal dashboard.
Step 2: Install The ScreenPalDesktop Application
Now that you have a ScreenPal account, you need to download and install its desktop application to start using it.
Here’s how to do it.
– In your account dashboard, click Make a Recording.
– This automatically starts the ScreenPal desktop application download.
– Save the setup file to your computer to run it.
– The setup will run and install the application to your system.
– Once the installation is complete, you’ll see the ScreenPal icon in the taskbar.

Step 3: Set Up Keyboard Shortcuts
Before using ScreenPal, it’s important to configure a few keyboard shortcuts. Otherwise, you’ll need to go to your taskbar every time you want to record a video or take a screenshot.
Here’s how to do it.
– Click on the ScreenPal icon in the taskbar to open its menu.
– Click on the Settings icon.
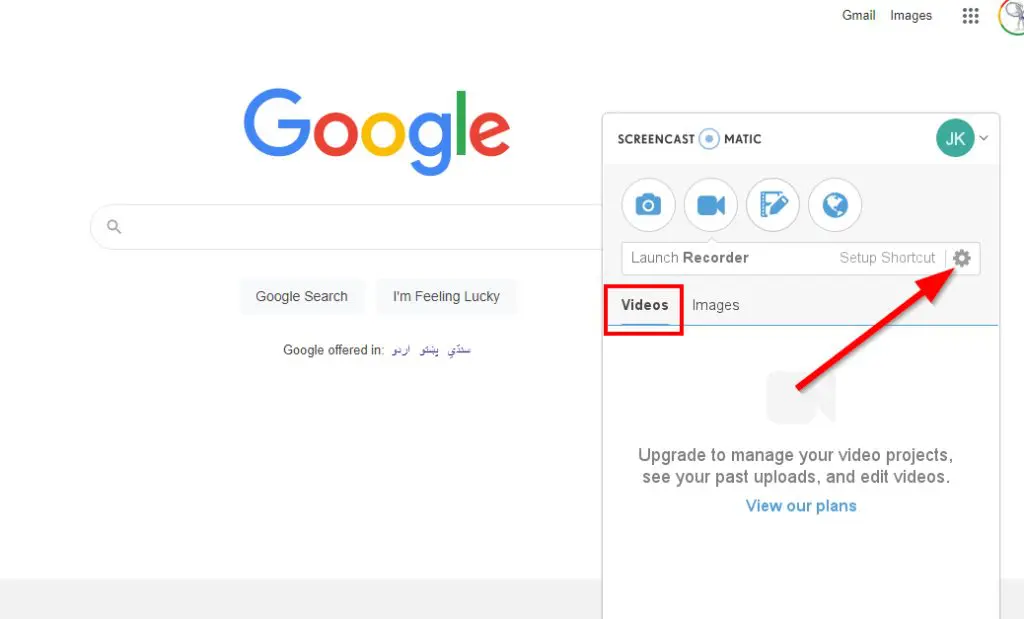
– In the Shortcut tab, enter the shortcuts you want to use for enabling the different features in ScreenPal.
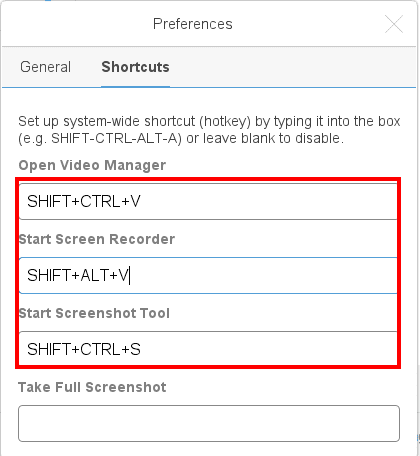
– Leave the shortcut fields blank to disable them.
Step 4: Start Using ScreenPal
Now that you have installed ScreenPal and configured the shortcuts, you can start using it for recording and editing videos and capturing screenshots.
How ScreenPal Works
Let me quickly explain how you can use the main features in ScreenPal.
How To Record A Video With ScreenPal
– Click on the ScreenPal icon in the taskbar.
– Click on the video camera icon to open the recorder.
– Alternately, you can use the keyboard shortcut to open the video recorder.

– Choose the recording area by adjusting the frame or choose full-screen recording from the menu.

– If you want to add narration to your video, enable your mic from the narration menu.
– Choose your screen, webcam, or both as the recording source.
– Now click Rec to start the recording.
– Once the recording is complete, click the stop button.
How To Capture A Screenshot With ScreenPal
– Click the ScreenPal icon in the taskbar and click the camera icon, or use the keyboard shortcut to open it.
– To capture a screenshot, drag and release the pointer to select the relevant area.
– ScreenPa gives you the option to edit your screenshot, save it to your computer, or upload it to your ScreenPal account.
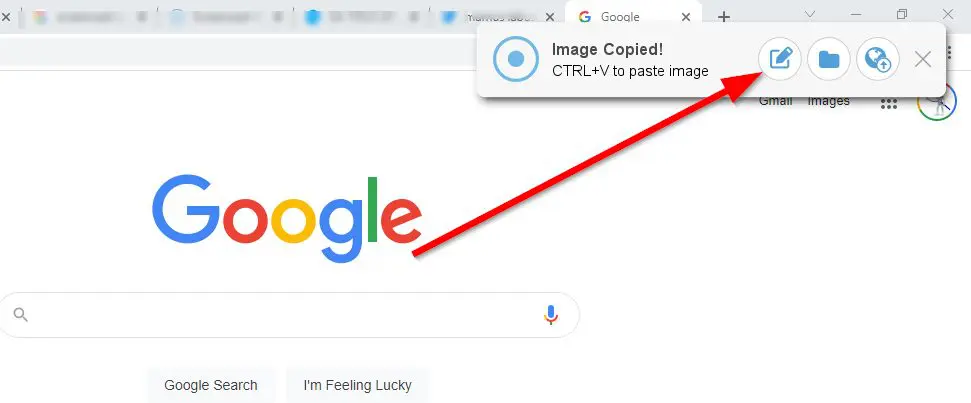
– Clicking the editor icon opens the image editor that allows you to add new shapes and elements, crop images, apply filters, and dozens of other options.
– Once you complete the editing process, save the image to your computer or account.
How To Edit A Video With ScreenPal
– Go to the ScreenPal website, sign-in to your account, and click the video editor icon.
- Click add video to upload a video file from your computer.
- The video editor takes a little time to upload and open the video file.
- Once the file is opened, you can start using various video editing features like trimming, cropping, annotations, CTAs, overlays, text boxes, shapes, audio tracks, etc.
- You can also use the editor to add stock music, sound effects, videos, and images to your videos.
- Once you complete editing, save the video file to your computer or ScreenPal account. You also have the option to publish it directly to YouTube, Google Drive, and several other platforms.
ScreenPal Pros & Cons | Its Strengths And Problems
Before moving on, let’s discuss some of the main pros and cons of ScreenPal (formerly Screencast-O-Matic).
Easy To Use
ScreenPal gets full marks for being extremely easy to use. It runs in the background without interfering with your work. But when you use its screenshot or recording shortcuts, it immediately shows up and does the job.
Plus, every feature in the recorder, screenshot tool, and video editor is neatly organized and comes with the necessary guidelines for your users.
So you won’t have any problems even if you’re using ScreenPal for the first time.
Unlimited Cloud Storage For Secure Backup
ScreenPal offers unlimited cloud storage and backup so that you can easily upload your content to your account, save your hard drive space, and access your videos from anywhere.
This feature is handy when you’re working as a distributed team and want to grant your team members access to your content.
ScreenPal’s cloud backup is completely secure and comes with AES-256 data encryption, which means no unauthorized user can watch, copy, delete, or modify your videos in any way.
Shareable Videos And Screenshots
ScreenPal allows you to share your videos and screenshots directly from the tool on any platform. For example,m once you record a screencast and fine-tune it with the video editor, you can upload it directly to YouTube, Facebook, Google Drive, Vimeo, and so many other platforms.
This not only saves time but also ensures that your content is safely added to your social media and video-sharing profiles.
High-Quality Stock Library
The ScreenPal stock library is among its most attractive features for online course creators. The stock library contains numerous HD videos, photographs, music tracks, and sound effects for all kinds of scenarios and industries.
It’s an easy way to enhance your content quality and publish professional-grade videos without spending thousands of dollars.
Desktop And Mobile Apps
ScreenPal offers desktop and mobile applications for Windows, Mac, Android, and iOS users. This means no matter what platform you and your team use, you can easily access your videos and screenshots in ScreenPal.
We’ve discussed some of ScreenPal’s main advantages. But here are some problems users can face while using it.
Frequent Software Crashes
ScreenPal’s desktop application frequently crashes, making it frustrating if you’re mid-way into a project. Secondly, its launcher sometimes freezes and does not open even if you click the recording or screenshot options from your account dashboard.
Limited Editing Options
ScreenPal’s video editor still lacks several advanced features, such as multiple audio tracks merging. In addition, its current audio editing features aren’t as robust as some of the other audio-video editors in the market.
The Verdict | Is ScreenPal The Right Video Recorder And Editor For You?
As you’ve seen in this review, there’s a lot to like about ScreenPal. It provides all the critical features for creating screen recordings and screenshots at an attractive price.
If you’re not into advanced video editing and only require a good enough video recorder, I’d strongly recommend going for one of Screencast-O-Matic’s paid plans.
However, if you’re looking for advanced video editing options as well, consider other options like Camtasia and Screenflow. You can also read our full round up of the best screen recording tools.
Frequently Asked Questions About ScreenPal
1. Can I use ScreenPal without installing anything?
Yes, you can launch the screen recorder directly from your browser without installing the desktop app. However, some advanced editing features require the desktop version.
2. Does ScreenPal work offline?
Yes, the desktop app works offline for recording and basic editing. You’ll need an internet connection to access cloud features, AI tools, and content sharing.
3. Can I record Zoom or Google Meet meetings with ScreenPal?
Yes, you can record any on-screen activity including Zoom, Meet, Teams, or Skype—just be sure you have permission from participants.
4. Does ScreenPal support green screen or virtual backgrounds?
While it doesn’t have a full green screen feature, the “blur webcam background” option in paid plans helps create a cleaner on-camera look.
5. How secure is my video content on ScreenPal?
ScreenPal offers private, password-protected sharing options, secure cloud hosting, and video access controls—even on the free plan.
6. Can I upload videos recorded elsewhere to ScreenPal for editing?
Yes, you can import external video files into ScreenPal and use the full editor, overlays, captions, and AI features on them.
7. Does ScreenPal support team collaboration in real-time?
Real-time collaboration isn’t available, but teams on the Business plan can manage shared folders, transfer video ownership, and assign roles.
8. Can I embed ScreenPal videos on my website?
Yes, all plans support video embedding. You can customize the player, add call-to-actions, and control visibility.
9. Does ScreenPal offer mobile apps?
Yes, there are free mobile apps for iOS and Android that let you record, trim, and upload videos on the go.
10. How does ScreenPal compare to Loom or Camtasia?
Loom focuses on quick business messaging, Camtasia is ideal for advanced editing, while ScreenPal offers a balanced mix of recording, editing, AI, and hosting for creators and educators—at a much lower cost.

Jeff Cobb, Founder of Learning Revolution
Jeff Cobb is an expert in online education and the business of adult lifelong learning. Over the past 20+ years he has built a thriving career based on that expertise – as an entrepreneur, a consultant, an author, and a speaker. Learning Revolution is a place where Jeff curates tips, insights, and resources to help you build a thriving expertise-based business. Learn more about Jeff Cobb here.
Table of Contents
Related Posts
How to Live Stream On YouTube Using StreamYard (2026)
How To Convert PowerPoint To An E-Learning Course (Step-By-Step Guide)
10Web.io Review (2026) | Is This AI Website Builder Worth The Hype? Pricing & Pros & Cons